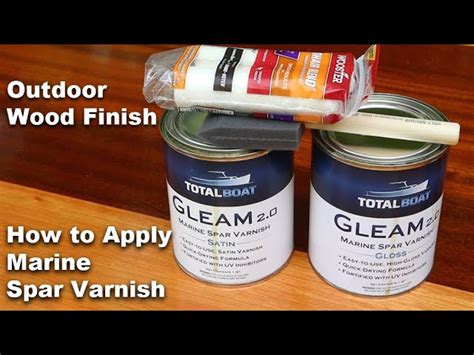
The Easiest Varnish Application Techniques for Boats
Maintaining a boat's finish requires regular varnish application. While the process might seem daunting, mastering a few easy techniques can significantly improve your results and reduce frustration. This guide covers the simplest and most effective varnish application methods, ensuring a professional-looking finish for your vessel. We'll cover everything from preparation to the final coat, addressing common questions boat owners often have.
Preparing Your Boat for Varnish Application
Before even thinking about the varnish, proper preparation is crucial for a long-lasting, beautiful finish. This stage is often overlooked, but it's the foundation of success.
1. Cleaning:
Thoroughly clean the surface to be varnished. Use a quality marine cleaner and degreaser to remove dirt, grime, salt deposits, and any old, loose varnish. Pay close attention to crevices and hard-to-reach areas. A pressure washer can be helpful, but use caution to avoid damaging the underlying wood.
2. Sanding:
After cleaning, lightly sand the surface with fine-grit sandpaper (around 220-320 grit). This will create a slightly rough surface that allows for better adhesion of the new varnish. Focus on smoothing any imperfections and removing any remaining blemishes. Always sand in the direction of the wood grain.
3. Dust Removal:
Remove all sanding dust with a tack cloth or a soft brush. Even the smallest dust particle can create imperfections in your varnish finish. Thorough dust removal is non-negotiable.
Choosing the Right Varnish and Tools
The type of varnish and your application tools directly impact the final result.
1. Varnish Selection:
Select a high-quality marine varnish specifically designed for exterior use. These varnishes are formulated to withstand harsh weather conditions, UV rays, and water exposure. Consider the gloss level – high gloss, satin, or semi-gloss – to match your boat's style.
2. Application Tools:
For easy application, a good quality brush is recommended. Natural bristle brushes are often preferred for their ability to hold more varnish and create a smoother finish. Foam brushes can also work well, especially for smaller areas or touch-ups, but they may not be ideal for large surfaces. A lint-free rag is useful for wiping off excess varnish.
Simple Varnish Application Techniques: Step-by-Step
Here's a breakdown of the easiest and most effective varnish application techniques:
1. Thin Coats are Key:
Avoid applying thick coats. Multiple thin coats are far superior to one thick coat. Thin coats dry faster, level out better, and are less likely to run or sag.
2. The "W" Technique:
Apply the varnish using a "W" pattern, overlapping each stroke slightly. This technique helps to ensure even coverage and prevents streaks.
3. Work in Small Sections:
Don't try to cover a large area at once. Work in manageable sections, typically around 2-3 square feet at a time. This allows you to maintain a wet edge and prevent lap marks.
4. Leveling:
After applying each coat, use a brush or a clean rag to gently level out any runs or sags. This helps to create a smooth, even surface.
5. Drying Time:
Allow each coat to dry completely before applying the next. Drying time varies depending on the varnish and environmental conditions, so always follow the manufacturer's instructions.
Addressing Common Questions:
How many coats of varnish do I need?
The number of coats depends on the condition of the existing finish and the desired level of protection. Typically, 3-4 coats are sufficient for a good protective layer.
How can I prevent runs and drips?
Apply thin coats, work in small sections, and use the "W" technique. Avoid overloading your brush.
What should I do if I see bubbles in my varnish?
Bubbles are often caused by applying the varnish too thickly or in hot, humid conditions. If bubbles appear, lightly sand the surface after it’s dry and reapply a thin coat.
What is the best way to clean my brushes?
Clean your brushes immediately after use with mineral spirits or the appropriate thinner recommended by the varnish manufacturer.
Conclusion:
Applying varnish to your boat doesn't have to be a complicated process. By following these easy techniques and paying attention to preparation, you can achieve a stunning, long-lasting finish that will protect your investment for years to come. Remember, patience and attention to detail are key to success.

