Delicious Hazelnut Oatmilk Shaken Espresso: A Step-by-Step Guide
The velvety texture, the nutty aroma, the invigorating caffeine kick – a hazelnut oatmilk shaken espresso is a coffee lover's dream. This guide will walk you through each step, ensuring you achieve café-quality results at home. Forget complicated equipment and expensive barista courses; with a few simple ingredients and techniques, you'll be crafting this delightful beverage in minutes.
What is a Shaken Espresso?
Before diving into the recipe, let's understand what makes a shaken espresso unique. Unlike a traditional espresso, which is simply poured into milk, a shaken espresso involves vigorously shaking espresso with cold milk (or in this case, oat milk) and ice. This process creates a wonderfully frothy, textured drink that's both refreshing and intensely flavorful. The shaking emulsifies the fats in the milk, resulting in a smoother, creamier texture compared to steamed milk.
Ingredients You'll Need:
- Strong Espresso: You'll need a double shot (around 60ml) of freshly brewed espresso. A strong brew is key to balancing the sweetness of the hazelnut oatmilk.
- Hazelnut Oatmilk: Choose your preferred brand of oatmilk. The hazelnut flavor enhances the overall experience. Unsweetened is generally preferred to allow you control over sweetness.
- Ice: Plenty of ice is crucial for achieving the perfect chilled, frothy consistency.
Step-by-Step Instructions:
-
Brew the Espresso: Begin by brewing your double shot of espresso. Ensure it's hot and freshly brewed for optimal flavor.
-
Chill the Oatmilk: While the espresso is brewing, chill your hazelnut oatmilk. Cold milk is essential for achieving the right texture and preventing the espresso from becoming too diluted.
-
Combine and Shake: Add the chilled oatmilk and ice cubes to a shaker (a cocktail shaker works perfectly). Pour the hot espresso over the ice and oatmilk. Secure the lid tightly.
-
Shake Vigorously: Shake the shaker vigorously for about 15-20 seconds. You should hear the ice clinking and the mixture becoming frothy. The longer you shake, the more frothy the drink becomes.
-
Strain (Optional): Some people prefer to strain the drink through a fine-mesh sieve to remove any ice shards. This is purely a matter of personal preference.
-
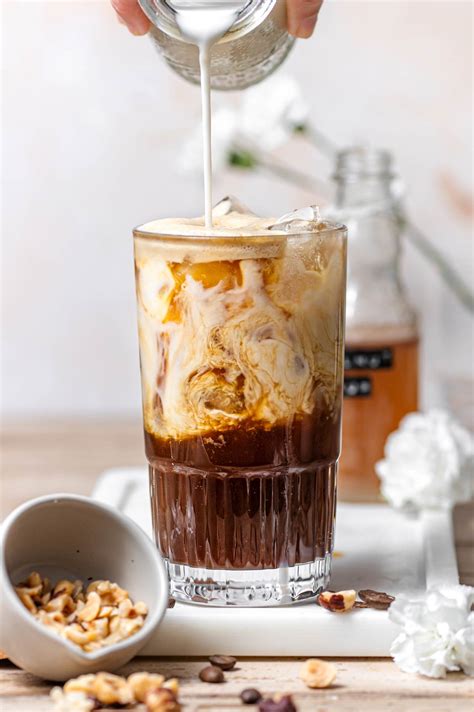
Pour and Enjoy: Pour your hazelnut oatmilk shaken espresso into your favorite glass. Add a sprinkle of cocoa powder, cinnamon, or even a drizzle of hazelnut syrup for an extra touch of decadence.
How to Adjust Sweetness and Flavor:
-
Sweetness: If you prefer a sweeter drink, add a touch of simple syrup, maple syrup, or your favorite sweetener after shaking. Taste and adjust to your liking.
-
Flavor Variations: Experiment with different flavorings! Vanilla extract, caramel syrup, or even a dash of chocolate syrup can create unique and delicious variations.
Troubleshooting Common Issues:
My Shaken Espresso is Too Watery:
This usually happens when the espresso isn't strong enough or when too much ice melts during the shaking process. Use a stronger espresso shot and ensure your milk is thoroughly chilled before shaking.
My Shaken Espresso Isn't Frothy Enough:
Insufficient shaking is the most common culprit. Shake vigorously for at least 15-20 seconds to achieve a good froth. Also ensure you’re using enough ice.
My Shaken Espresso is Too Sweet:
If your drink is too sweet, simply reduce the amount of sweetener you add next time.
What is the best oat milk for a shaken espresso?
The best oatmilk for a shaken espresso is largely a matter of personal preference. Some people prefer a creamy, thicker oatmilk, while others prefer a thinner, lighter variety. Experiment with different brands and types to find your favorite. Look for unsweetened varieties to have more control over the sweetness of the drink.
Conclusion:
Crafting the perfect hazelnut oatmilk shaken espresso is easier than you think. By following these steps and experimenting with flavors, you can create a delicious and refreshing coffee experience at home, every time. So grab your shaker, and let the delightful shaking begin!

