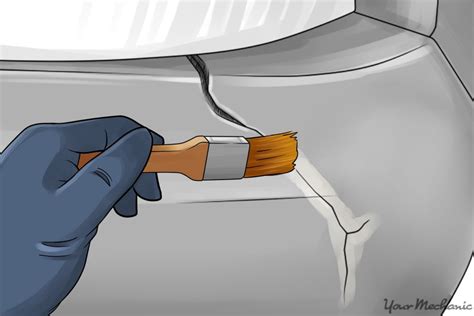
Clean Bumper Hole Repair: A Step-by-Step Guide
A small hole in your bumper can quickly mar the otherwise pristine look of your car. Luckily, repairing these blemishes doesn't require a trip to the auto body shop. With the right tools and a little patience, you can achieve a clean, professional-looking repair at home. This guide provides a comprehensive step-by-step process for fixing those annoying bumper holes.
Assessing the Damage: What Kind of Hole Do You Have?
Before starting any repair, it's crucial to assess the damage. The size and type of hole will determine the best repair method.
- Small Holes (less than ½ inch): These are often the easiest to fix using methods like plastic weld or a bumper repair kit.
- Larger Holes (½ inch or more): Larger holes might require more extensive repair, potentially including using a mesh backing for support before filling.
- Cracked or Broken Areas: If the hole is part of a larger cracked or broken section, you may need additional techniques, like reinforcing the area before filling.
Tools and Materials You'll Need
The specific materials will depend on the size and nature of the hole, but generally you’ll need:
- Plastic Bumper Repair Kit: This usually includes a plastic welding rod (matched to your bumper's plastic type – check your owner's manual), adhesive, and a surface preparation tool.
- Clean Cloth/Rags: To keep the work area clean and wipe away excess material.
- Sandpaper (various grits): Starting with a coarser grit (e.g., 80-grit) and progressing to finer grits (e.g., 200-grit and then 400-grit) to smooth the surface.
- Safety Glasses: Always protect your eyes when working with tools and chemicals.
- Primer: Designed for plastics. This will ensure proper adhesion for the paint.
- Touch-up Paint: Matching your car's bumper color.
- Clear Coat: To protect the paint job.
- Putty Knife or Similar Tool: To apply the plastic welding material.
- Heat Gun (Optional): To help melt and blend the plastic welding material. Use with extreme caution.
- Masking Tape: To protect surrounding areas during painting.
Step-by-Step Repair Process
1. Preparation: Cleaning and Surface Prep
This is arguably the most critical step. Thoroughly clean the area around the hole with soap and water, then use a degreaser to remove any remaining dirt, grease, or wax. Allow it to dry completely. Roughen up the edges of the hole using sandpaper to create a better surface for the filler to bond to.
2. Filling the Hole: Plastic Welding or Repair Kit
Small Holes: Follow the instructions on your chosen bumper repair kit, typically applying adhesive to the back of the hole, then melting and pressing in the plastic welding rod to fill the gap. A heat gun can aid this process but requires careful control to avoid damage.
Larger Holes: For larger holes, you might need to use a plastic mesh backing to reinforce the area before filling. This adds structural integrity and prevents future cracking. Fill the hole with the plastic welding material, layering as needed and allowing each layer to cool slightly before adding more.
3. Sanding and Smoothing
Once the filler is completely dry and cool, begin sanding. Start with a coarser grit sandpaper to remove excess filler and level the surface. Gradually move to finer grits to achieve a smooth, even finish. Take your time and be patient; a smooth surface is crucial for a professional-looking repair.
4. Priming and Painting
Apply a thin layer of primer specifically formulated for plastics. This promotes better paint adhesion. Allow the primer to dry completely according to the manufacturer's instructions. Next, carefully apply the touch-up paint, using thin coats to avoid drips or runs. Let each coat dry before applying the next.
5. Clear Coat Protection
Once the paint is completely dry, apply a few coats of clear coat. This protects the repair and helps it blend seamlessly with the surrounding paint. Allow the clear coat to dry thoroughly before handling the area.
6. Final Inspection and Polishing (Optional)
Once everything is completely dry, inspect your work. If necessary, you may need to do some light polishing to remove any imperfections.
Frequently Asked Questions (FAQs)
What type of plastic is usually used in bumpers?
Bumper materials vary by car make and model, but common plastics include polypropylene (PP) and polyurethane (PU). Always check your owner’s manual or the bumper itself (sometimes stamped with material codes) to determine the type of plastic you're working with. Using the correct plastic welding rod is essential for a strong repair.
How can I match the paint color perfectly?
Getting an exact paint match can be tricky. Your best bet is to obtain touch-up paint from your car's manufacturer or a reputable auto parts store, providing your Vehicle Identification Number (VIN).
What if the hole is too large to repair myself?
For very large holes or extensive damage, professional repair is recommended.
By following this step-by-step guide, you can effectively repair small holes in your car's bumper, restoring its appearance and saving yourself a trip to an expensive repair shop. Remember to take your time, be patient, and follow the instructions carefully for the best results.

