The Ultimate Guide to Flute Cleaning and Sterilization
For flutists, the flute is more than just an instrument; it's an extension of themselves. To ensure optimal performance and longevity of your beloved instrument, regular cleaning and sterilization are crucial. This comprehensive guide will cover everything you need to know about keeping your flute sparkling clean and hygienically sound. We'll delve into the specifics of cleaning different parts, address common concerns, and offer tips for maintaining your flute's pristine condition.
Why Clean and Sterilize Your Flute?
Regular cleaning and sterilization go beyond simple aesthetics. Neglecting this vital aspect can lead to several issues:
- Hygiene: Your mouth comes into direct contact with the instrument, making it a breeding ground for bacteria and germs. This can lead to illness and unpleasant odors.
- Performance: A buildup of saliva, oils, and other residues can clog the tone holes and affect the instrument's intonation and overall sound quality.
- Instrument Damage: Accumulated moisture can cause corrosion and damage to the metal, particularly in silver flutes.
- Pad Damage: Moisture can seep into the pads, causing them to deteriorate prematurely, requiring costly repairs.
What You'll Need:
Before we begin, gather these essential cleaning supplies:
- Microfiber cloths: These are gentle and effective at removing grime without scratching the delicate metal.
- Rod and cleaning swab: These are specifically designed for cleaning the inside of the flute's body. Avoid using anything abrasive.
- Flute cleaning solution: Many commercially available solutions are designed specifically for flutes. Avoid harsh chemicals. (Note: Always follow the manufacturer's instructions.)
- Cork grease: This is essential for maintaining the proper sealing of the joints.
- Soft brush (optional): A soft-bristled brush can be helpful for removing stubborn dirt from hard-to-reach areas.
- Distilled water: This is preferred over tap water to avoid leaving mineral deposits.
Step-by-Step Cleaning Process:
- Disassembly: Carefully disassemble your flute into its sections: headjoint, body, and footjoint. Remember how the pieces go back together!
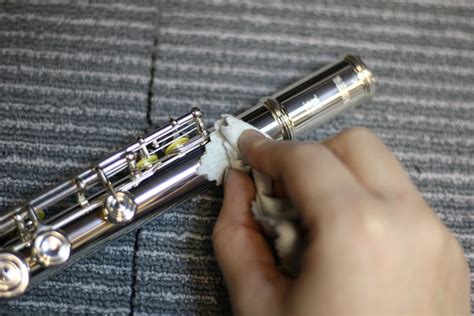
- Exterior Cleaning: Wipe down the exterior of each section with a microfiber cloth. Pay attention to crevices and tone holes.
- Interior Cleaning: Use the cleaning rod and swab to clean the inside of the headjoint and body. Dip the swab in the cleaning solution, but don't saturate it. Gently pass it back and forth several times. Repeat until the swab comes out clean.
- Footjoint Cleaning: Clean the footjoint similarly, using the rod and swab. Special attention should be paid to this area as moisture tends to accumulate here.
- Pad Cleaning: If your pads appear dirty, use a very slightly damp (not wet) cloth to gently clean their surfaces. Avoid getting moisture underneath.
- Cork Grease Application: Apply a small amount of cork grease to the cork joints, ensuring smooth, secure connections.
- Reassembly: Carefully reassemble your flute, paying attention to the correct alignment of each section.
- Final Wipe Down: Give your flute one final wipe down with a clean microfiber cloth to remove any remaining moisture or residue.
Sterilization Techniques:
Beyond regular cleaning, consider incorporating sterilization techniques to eliminate bacteria and germs:
- Ultrasonic Cleaner: These machines use sound waves to dislodge dirt and bacteria, offering a thorough cleaning. Follow the manufacturer's instructions, as the process and solution might vary.
- UV Sterilization: UV light can effectively kill bacteria and viruses. While not commonly used for flute sterilization, specialized UV sterilizers for instruments are available.
How Often Should I Clean My Flute?
The frequency of cleaning depends on how often you play. As a general rule:
- After each practice or performance: Wipe down the exterior and run a swab through the body.
- Deep cleaning (with disassembly): At least once a month, or more frequently if you play regularly.
What if My Flute Still Smells Bad After Cleaning?
If your flute still smells bad even after thorough cleaning, several factors could be at play:
- Pad deterioration: Damaged pads can retain odors and moisture, potentially requiring replacement.
- Cork issues: Inspect cork joints for any cracks or damage. Replace any damaged cork.
- Lingering residue: Use a more effective cleaning solution, ensuring the swab reaches all parts of the interior.
Conclusion:
Maintaining the hygiene and condition of your flute is essential for both its longevity and your playing experience. By following the steps outlined in this guide, you can ensure that your flute remains clean, sterilized, and ready to produce its best sound for years to come. Remember, consistent cleaning and care will significantly extend the life of your instrument and guarantee many years of enjoyable music-making.

