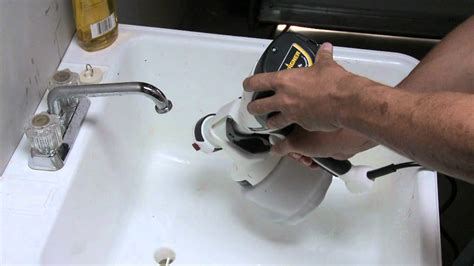
Water Paint Sprayer Cleaning: A Step-by-Step Guide
Maintaining your water-based paint sprayer is crucial for its longevity and to prevent clogs and poor performance on future projects. A thorough cleaning after each use is essential, and this comprehensive guide will walk you through the process, ensuring your sprayer remains in top condition. We'll cover everything from immediate post-use cleanup to more in-depth maintenance.
Why Clean Your Water Paint Sprayer?
Neglecting to clean your paint sprayer can lead to several frustrating issues:
- Clogged Nozzles: Dried paint will quickly clog the delicate nozzles, requiring significant effort (or even replacement) to clear.
- Ruined Projects: Leftover paint can contaminate future projects, resulting in undesirable color mixing and uneven finishes.
- Reduced Sprayer Lifespan: Dried paint buildup puts extra strain on the pump and other internal components, shortening the lifespan of your valuable tool.
- Difficult Cleanup: The longer you wait, the harder it becomes to clean your sprayer. Fresh paint is far easier to remove than dried, hardened residue.
Essential Supplies for Cleaning
Before you begin, gather the necessary supplies:
- Warm water: Use warm (not hot) water to help dissolve the paint.
- Appropriate cleaning solution: Consult your sprayer's manual for recommended cleaning solutions. Generally, mild dish soap or a specialized paint sprayer cleaner works well for water-based paints. Avoid harsh chemicals.
- Paint sprayer cleaning brushes: These are designed to reach tight spaces within the sprayer.
- Rags or paper towels: For wiping down surfaces and absorbing excess water.
- Container: For holding the cleaning solution and rinsing water.
Immediate Post-Use Cleaning: The Quick Clean
This should be performed immediately after completing your painting project. It prevents paint from drying and solidifying, making future cleaning much easier.
- Flush with Water: Run warm water through the sprayer until the water runs clear. This removes most of the loose paint. Many sprayers have a self-priming feature that can assist with this process.
- Initial Cleaning Solution Run: Add a small amount of cleaning solution to the reservoir and run it through the sprayer for a short period, followed by a thorough water rinse.
- External Wipe Down: Wipe down the exterior of the sprayer with a damp rag to remove any spilled or splashed paint.
Deep Cleaning: For a Thorough Cleanse
This procedure should be undertaken after multiple uses or if you notice any signs of clogging or decreased performance.
- Disassemble: Carefully disassemble your sprayer according to the manufacturer's instructions. This typically involves removing the reservoir, filter, nozzle, and other removable parts.
- Soak Removable Parts: Soak the disassembled parts in warm, soapy water for at least 30 minutes (or longer for stubborn paint). A specialized paint sprayer cleaner can further enhance the cleaning process.
- Scrub with Brushes: Use paint sprayer cleaning brushes to gently scrub away any remaining paint residue from the internal components. Pay close attention to the nozzle, filter, and any small crevices.
- Rinse Thoroughly: Rinse all parts thoroughly under warm running water until all traces of soap and paint are gone.
- Dry Completely: Allow all parts to air dry completely before reassembling. This prevents rust and ensures proper functionality.
- Reassemble: Once everything is dry, reassemble your sprayer carefully, following the manufacturer's instructions precisely.
Troubleshooting Common Issues
Clogged Nozzle: If your nozzle is clogged, try soaking it in a cleaning solution for a longer period or using a fine needle or pin to carefully clear the blockage. Avoid excessive force to prevent damage.
Uneven Spray Pattern: This could indicate a partially clogged nozzle or a problem with the air pressure. Ensure the sprayer is clean and properly assembled, and check the air pressure settings.
Maintaining Your Water Paint Sprayer
Regular cleaning is key to maintaining your sprayer. Consider performing a quick clean after every use and a deep clean after every few projects. This simple maintenance will prolong the life of your tool and ensure you get perfect results every time.
Frequently Asked Questions (FAQ)
What type of cleaning solution should I use for my water-based paint sprayer?
Mild dish soap or a specialized paint sprayer cleaner is usually sufficient for water-based paints. Always refer to your sprayer's manual for specific recommendations.
How often should I clean my water paint sprayer?
Ideally, you should perform a quick clean after every use and a thorough deep clean after every few projects or whenever you notice decreased performance.
Can I use hot water to clean my water paint sprayer?
It's best to avoid using hot water, as it can damage some sprayer components. Warm water is generally sufficient.
What should I do if my paint sprayer nozzle is clogged?
Soak the nozzle in a cleaning solution for an extended period. If that doesn't work, carefully try using a fine needle or pin to clear the blockage.
By following these steps and addressing potential problems proactively, you'll ensure your water-based paint sprayer continues to provide years of reliable service. Remember, consistent cleaning is the key to maintaining its peak performance.

