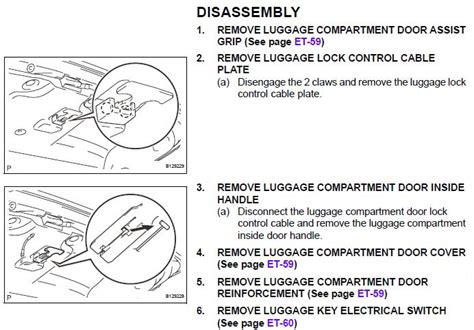
Trunk Liner Clip Removal: A Step-by-Step Tutorial
Removing your trunk liner clips can seem daunting, but with the right approach, it's a straightforward process. Whether you're installing a new liner, accessing wiring, or simply need to repair a damaged clip, this guide will walk you through the process, minimizing the risk of damage to your vehicle. We'll cover various clip types and provide troubleshooting tips for stubborn clips.
Why Remove Trunk Liner Clips?
There are several reasons why you might need to remove your trunk liner clips:
- Replacing a damaged trunk liner: A worn-out or damaged liner often requires clip removal for replacement.
- Accessing wiring or components: Many vehicles have wiring harnesses and other components located beneath the trunk liner. Removing the liner grants access for repairs or modifications.
- Cleaning the trunk area: A thorough cleaning might require removing the liner for more efficient cleaning under and around the liner.
- Installing aftermarket accessories: Some aftermarket accessories, like subwoofers or organizers, require the removal of the trunk liner for proper installation.
Identifying Your Trunk Liner Clips
Trunk liner clips vary significantly depending on the make, model, and year of your vehicle. Common types include:
- Push-type clips: These clips are pressed into place and typically require a slight twist or pull to release.
- Snap-type clips: These clips snap into place and generally require more force to remove.
- Screw-type clips: These clips are secured with screws and require a screwdriver for removal.
- Plastic retaining clips: Often these have a small lip or prong that needs to be depressed or manipulated before the clip can be removed.
Tools You'll Need
Before starting, gather the necessary tools:
- Flathead screwdriver (small and medium sizes): Useful for prying stubborn clips. Use a plastic or nylon tool to prevent scratching the paint.
- Panel removal tool (optional): These tools are designed to protect your car's interior and help with prying up clips.
- Gloves (optional): Protecting your hands is always a good idea.
Step-by-Step Guide to Trunk Liner Clip Removal
1. Preparation: Locate all visible clips holding the trunk liner in place. Examine them carefully to determine their type. Take photos before removing the liner to aid in reinstallation.
2. Removing Push-Type Clips: Gently insert the flathead screwdriver (or panel removal tool) under the clip and carefully pry it away from the body panel. Often, a slight twist or pull will release the clip.
3. Removing Snap-Type Clips: These often require more force. Start by carefully inserting your tool and applying gentle but firm pressure to release the clip. Work slowly and methodically to avoid breakage.
4. Removing Screw-Type Clips: Unscrew the clips using the appropriate screwdriver. Be careful not to strip the screw heads.
5. Removing Plastic Retaining Clips: These often have a small lip or notch that needs to be pressed or moved before the clip can be released. Examine the clip closely to determine the correct method for removal. You may need to use a smaller flathead screwdriver to engage the lip or notch.
6. Releasing the Liner: Once the clips are removed, carefully lift the trunk liner away from the body panel. Be mindful of any wiring or other components connected to the liner.
Troubleshooting Stubborn Clips
If you encounter particularly stubborn clips, try these tips:
- Apply lubricant: A small amount of lubricant, such as WD-40, can help loosen stuck clips.
- Use a heat gun (carefully): Gentle heat can make the plastic more pliable and easier to remove. Exercise extreme caution to avoid damage to the liner or surrounding components.
- Seek professional help: If you're struggling, it's best to seek professional assistance to avoid damaging your vehicle.
Reinstalling the Trunk Liner
After completing your work, reinstall the trunk liner by reversing the removal process. Make sure all the clips are securely fastened before closing the trunk.
What if I Break a Trunk Liner Clip?
Breaking a clip during removal is a possibility. Most auto parts stores sell replacement clips, often categorized by size and type. You can usually find the correct replacement with your vehicle's make, model, and year.
How Do I Know What Type of Clips My Car Uses?
The best way to determine the type of clips your car uses is by visual inspection. However, consulting your vehicle's repair manual can also provide valuable information about the specific type and location of the clips.
This detailed guide provides a comprehensive approach to trunk liner clip removal. Remember to work carefully and patiently, and don't hesitate to seek professional assistance if needed. By following these steps, you can successfully access and repair the area beneath your trunk liner without causing unnecessary damage to your vehicle.

