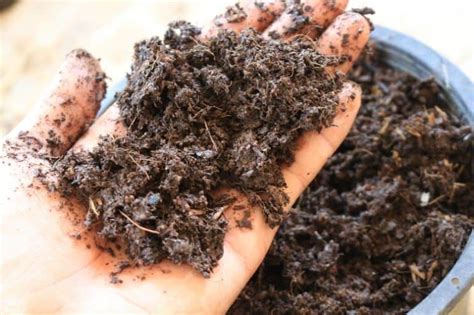
The Ultimate Soil Drying Guide: Fast and Easy Methods
Getting your soil to the right moisture content is crucial for many tasks, from potting plants to preparing for construction projects. Whether you're dealing with a small amount of damp potting mix or a large quantity of excavated earth, knowing how to dry soil efficiently is essential. This comprehensive guide explores various methods, from simple air drying to accelerated techniques, helping you achieve the desired dryness quickly and easily.
Why is Drying Soil Important?
Before diving into the methods, let's understand why drying soil is necessary in the first place. Different applications require different soil moisture levels:
- Potting and Gardening: Overly wet soil can suffocate plant roots, leading to root rot and plant death. Properly dried soil ensures good drainage and aeration.
- Construction and Landscaping: Dry soil is vital for stable foundations, proper compaction, and preventing issues like settling or erosion.
- Crafting and Art Projects: Many crafting projects, like pottery or making natural dyes, require specific soil moisture levels for optimal results.
- Soil Sample Analysis: Accurate soil testing demands dry samples to ensure reliable results.
How to Dry Soil: A Step-by-Step Guide
The best method for drying soil depends on the amount of soil, the urgency, and the desired level of dryness. Here are several effective techniques:
1. Air Drying: The Simple and Natural Method
This is the most straightforward approach, ideal for smaller quantities of soil.
- Spreading it out: Spread the soil thinly on a clean, dry surface like a tarp, sheet of plastic, or even a large baking sheet. The thinner the layer, the faster it will dry.
- Location, location, location: Choose a sunny, well-ventilated area with good airflow. Direct sunlight accelerates the drying process.
- Turning and mixing: Regularly turn and mix the soil to ensure even drying. Clumped soil will dry more slowly.
- Timeframe: Air drying can take anywhere from a few hours to several days, depending on factors like humidity and temperature.
2. Using an Oven: A Faster, Controlled Approach
For more precise control and faster drying, an oven is a good option, particularly for smaller batches.
- Preheating: Preheat your oven to a low temperature, around 170-200°F (77-93°C). Higher temperatures can damage the soil's structure.
- Spread it thinly: Spread the soil evenly on a baking sheet, ensuring a thin layer.
- Monitoring and stirring: Regularly monitor the soil and stir it to prevent burning or uneven drying.
- Timeframe: Oven drying usually takes several hours, but the time varies depending on the oven's power, the soil's moisture content, and the oven's temperature.
3. Using a Dehydrator: The Efficient Solution for Larger Quantities
A food dehydrator offers a controlled and efficient way to dry larger amounts of soil.
- Layer it evenly: Spread the soil evenly across the dehydrator trays.
- Temperature and airflow: Follow the manufacturer's instructions for temperature settings and airflow. Most dehydrators have settings specifically for low-temperature drying.
- Timeframe: A dehydrator can significantly reduce drying time compared to air drying, usually taking several hours to a day, depending on the soil's moisture content.
4. Accelerated Drying with Heat Lamps or Fans: Boosting the Process
For larger projects where time is a critical factor, you can supplement air drying with external heat sources.
- Heat Lamps: Position a heat lamp a safe distance above the soil to gently increase the temperature. Caution: Avoid direct, intense heat, which can scorch the soil.
- Fans: Use a fan to improve air circulation, accelerating the evaporation process.
Troubleshooting Common Issues
- Soil clumping: Break up clumps before drying to ensure even moisture removal.
- Uneven drying: Regularly turn and stir the soil to prevent uneven moisture distribution.
- Over-drying: Over-dried soil can become difficult to work with. Monitor the soil closely and stop drying once it reaches the desired consistency.
Frequently Asked Questions
How long does it take to dry soil?
The drying time varies greatly depending on the method used, the amount of soil, its initial moisture content, and environmental conditions (temperature, humidity, airflow). Air drying can take days, while oven or dehydrator methods significantly reduce drying time.
Can I use a microwave to dry soil?
While possible for very small quantities, using a microwave to dry soil is generally not recommended. Microwaves can cause uneven heating, leading to scorching or potential damage to the soil's structure.
How do I know when the soil is dry enough?
The desired dryness depends on the intended use. For potting, the soil should be crumbly and moist, but not soggy. For construction, it should be completely dry to the touch. A simple test is to squeeze a handful – if no water is released, it's likely dry enough.
Can I dry clay soil?
Yes, clay soil can be dried using the methods outlined above, but it may take longer due to its higher water retention capacity. Remember to break up clumps to facilitate drying.
By following these guidelines and selecting the appropriate method for your needs, you can efficiently and effectively dry your soil, ensuring successful outcomes for your various projects. Remember to always prioritize safety and use caution when using heat sources.

