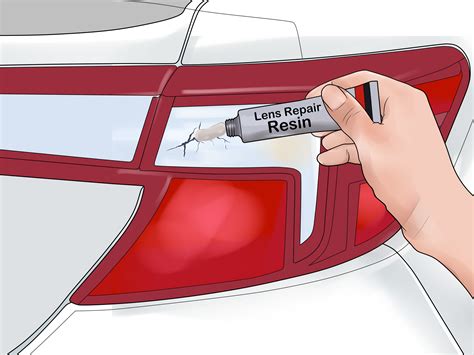
Tail Light Fix: Expert Tips for Low-Cost Repairs
Dealing with a broken tail light can be a frustrating experience. Not only is it a safety hazard, but it can also lead to hefty repair bills if you're not careful. This comprehensive guide provides expert tips and tricks to fix your tail light at a fraction of the cost of professional repair. We'll explore various scenarios, from simple bulb replacements to more complex repairs, ensuring you're equipped to handle the situation effectively.
How Much Does it Cost to Fix a Tail Light?
The cost of fixing a tail light varies greatly depending on the issue. A simple bulb replacement might cost only a few dollars for the bulb itself. However, if the housing is cracked or the entire assembly needs replacing, costs can escalate to hundreds of dollars, especially for newer vehicles with advanced lighting systems. This is why understanding DIY repair options is crucial for saving money.
What are the Most Common Tail Light Problems?
Before diving into repair solutions, let's identify the common issues:
- Burned-out Bulb: This is the most frequent problem, easily solved with a simple replacement.
- Cracked or Broken Lens: Damage to the tail light lens can be caused by impacts or general wear and tear.
- Wiring Issues: Faulty wiring can prevent the lights from functioning correctly. This can involve broken wires, corroded connections, or damaged connectors.
- Faulty Tail Light Assembly: In some cases, the entire assembly might be defective and require replacement.
DIY Tail Light Repair: A Step-by-Step Guide
1. Replacing a Burned-Out Bulb:
This is often the easiest fix. Consult your vehicle's owner's manual to locate the tail light assembly and the specific bulb type. Many vehicles require only a simple twist or a gentle pull to remove the old bulb and insert the new one. Ensure you purchase the correct bulb type – using the wrong one can lead to further issues.
2. Repairing a Cracked or Broken Lens:
Minor cracks may be temporarily fixed using clear silicone sealant or epoxy. Clean the area thoroughly before application, and ensure a proper seal to prevent moisture intrusion. For significant damage, replacing the entire lens or assembly is generally recommended.
3. Troubleshooting Wiring Issues:
If your tail light isn't working, but the bulb is fine, the problem likely lies in the wiring. Carefully inspect the wiring harness for any visible damage, corrosion, or loose connections. Use electrical tape to insulate any exposed wires or connectors. For more serious damage, professional assistance may be necessary.
4. Replacing the Entire Tail Light Assembly:
If the damage is extensive or you're uncomfortable working with electrical systems, replacing the entire assembly might be the best option. You can purchase aftermarket assemblies at significantly lower costs than those offered by dealerships. However, ensure the replacement is compatible with your vehicle's model and year.
Finding Affordable Replacement Parts
One of the key factors in keeping repair costs low is sourcing affordable parts. Here are some helpful tips:
- Online Retailers: Websites specializing in auto parts often offer significantly discounted prices compared to local auto parts stores.
- Auto Part Recyclers: These facilities offer used parts at a fraction of the cost of new ones. This is a great option for less critical components like tail light assemblies.
- Local Auto Parts Stores: Although they may be more expensive, local stores offer the convenience of immediate availability.
Preventing Future Tail Light Problems
Regularly inspecting your tail lights for damage or malfunctions is crucial for preventing costly repairs. Clean the lenses periodically to remove dirt and debris that can obscure the light. Also, be mindful of parking carefully to avoid collisions that can damage your lights.
Frequently Asked Questions (FAQs)
H2: How do I know which tail light bulb I need?
Your vehicle's owner's manual will specify the correct bulb type for each light. Alternatively, you can check the old bulb for markings indicating the type and wattage. Auto parts stores also have databases that can help you identify the correct bulb based on your vehicle's year, make, and model.
H2: Can I use superglue to repair a cracked tail light lens?
While superglue might seem like a quick fix, it's not recommended for repairing cracked tail light lenses. Superglue doesn't offer the flexibility and weather resistance needed to withstand the elements and vibrations of driving. Using a suitable sealant or epoxy is a better approach.
H2: Is it safe to drive with a broken tail light?
No, it's not safe to drive with a broken tail light. It's a significant safety hazard, as it can impair visibility for other drivers, increasing the risk of accidents. Repair or replace the broken tail light as soon as possible. Driving with a faulty tail light can also result in fines in many jurisdictions.
H2: How long does it take to replace a tail light bulb?
Replacing a tail light bulb typically takes only a few minutes, once you've located the bulb and understand the removal/installation process.
By following these tips and taking a proactive approach, you can significantly reduce the cost of tail light repairs while ensuring your vehicle remains safe and roadworthy. Remember, safety should always be your top priority.

