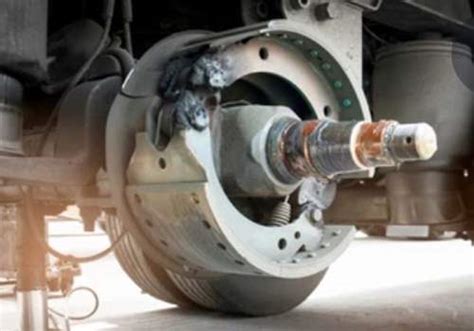
Simple Trailer Brake Diagnostics: Without a Truck
Diagnosing trailer brake problems can be a headache, especially without the convenience of a truck hooked up. This guide provides straightforward methods for testing your trailer brakes independently, helping you identify issues before they cause accidents. We'll cover various diagnostic techniques, suitable even for those with limited mechanical experience.
What Tools Will I Need?
Before we begin, gather these essential tools:
- Multimeter: A digital multimeter is crucial for checking electrical continuity and voltage.
- Test Light: A 12-volt test light offers a visual indication of electrical circuits.
- Screwdrivers (Phillips and Flathead): For accessing brake components and electrical connections.
- Wire Strippers/Crimpers: For working with electrical wiring if repairs are needed.
- Wrench Set: To remove brake components as necessary. Sizes will vary depending on your trailer’s braking system.
How Do I Check the Trailer Lights?
Before diving into the brakes themselves, ensure your trailer's lights are functioning correctly. Faulty lighting often indicates problems with the wiring harness, which can also affect brake functionality. Connect your trailer wiring harness to a compatible 7-pin or 4-pin connector (you can purchase an inexpensive tester for this) and test all lights—turn signals, brake lights, running lights, etc. A faulty light circuit might point to a broken wire, corroded connection, or a blown bulb.
Testing the Breakaway System:
The breakaway system is critical for safety. It activates the brakes if the trailer detaches from the towing vehicle. Locate the breakaway battery and cable. Using your multimeter or test light, check the battery's voltage and the continuity of the cable connecting to the brake actuator. A low voltage or broken wire means the breakaway system needs attention.
Checking the Electric Brake Actuator:
The electric brake actuator is the heart of the electric braking system. With the trailer's brakes disengaged, use your multimeter to check the resistance across the actuator's terminals. Refer to your trailer's manual or the actuator's specifications for the expected resistance range. A significantly higher or lower resistance may indicate an internal problem with the actuator.
Inspecting the Brake Magnets/Actuators:
Visually inspect each brake magnet/actuator for any damage, corrosion, or loose mounting. Lightly try to rotate the actuator's armature—it should be free from any binding. Any stiffness or seizing could point to mechanical issues. You can gently tap the magnet to see if it moves freely in the housing.
Testing the Wiring Harness:
A common problem is damaged or corroded wiring. Carefully inspect the entire harness, paying close attention to connections and areas prone to abrasion. Use your multimeter to check the continuity of each wire throughout the harness. Pay particular attention to any areas where the wiring may rub against the frame or other components.
What if I Have Hydraulic Brakes?
Hydraulic brake systems on trailers require a different approach. You'll need to manually check the master cylinder for leaks and ensure sufficient hydraulic fluid level. You may also need to check the individual brake lines and wheel cylinders for leaks, which often requires specialized tools and knowledge. A professional inspection is advisable in such cases.
When to Seek Professional Help:
While these diagnostic techniques cover basic checks, certain problems require specialized tools and expertise. If you're unsure about any aspect of the diagnosis or repair, consult a qualified trailer repair professional. Safety is paramount when dealing with braking systems.
This guide provides a starting point for diagnosing your trailer brakes. Remember always to prioritize safety and seek professional help when needed. Regular maintenance and careful inspection will prevent major issues and ensure your trailer brakes are always in optimal condition.

