Simple Battery Cable Extension: No Special Tools Needed
Extending your battery cables might seem like a daunting task, requiring specialized tools and expertise. But the truth is, extending your car's battery cables can be surprisingly simple, often achievable with basic household tools and a little know-how. This guide will walk you through a straightforward method requiring no specialized equipment, perfect for DIY enthusiasts of all levels.
Why Extend Battery Cables?
Before diving into the how-to, let's understand why you might need to extend your battery cables. Several reasons necessitate this seemingly minor modification:
- Battery Relocation: Moving your battery to a different location in your vehicle, perhaps for weight distribution or custom builds, often requires longer cables to reach the starter and other electrical components.
- Increased Cable Length for Accessories: Adding aftermarket accessories like powerful amplifiers or winches might require longer cables to accommodate the increased current draw. Short cables can overheat and become a safety hazard.
- Repairing Damaged Cables: If your existing cables are frayed, corroded, or otherwise damaged, extending them can be a cost-effective solution compared to replacing the entire cable.
Tools and Materials You'll Need:
This project keeps things incredibly simple. You'll only need:
- Battery cable extension wire: Choose a gauge appropriate for your vehicle's electrical system. Using a lower gauge (thicker wire) than your original cables is always preferable to minimize voltage drop and resistance. Consult your vehicle's manual or a wiring diagram to determine the correct gauge.
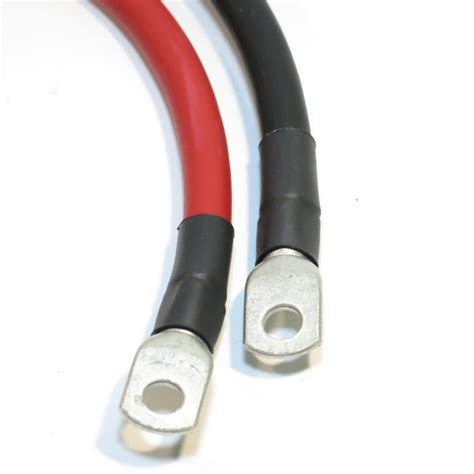
- Ring terminals: These are crucial for creating secure connections. Select ring terminals that match the size of your battery cable extension wire and your battery terminals.
- Crimping tool (optional, but highly recommended): While you can potentially solder the ring terminals, crimping offers a superior, more reliable connection that is less prone to failure. If you don't own a crimping tool, you may consider borrowing one or purchasing a relatively inexpensive set.
- Electrical tape: For added insulation and protection against corrosion.
- Wire cutters/strippers: To cut and strip the insulation from the extension wire.
- Screwdriver (if necessary): To remove and re-attach any battery cable clamps.
Step-by-Step Guide to Extending Battery Cables:
-
Safety First: Disconnect the negative (-) battery terminal first, then the positive (+) terminal. This prevents accidental shorts and potential damage to your vehicle's electrical system.
-
Measure and Cut: Measure the required length of your extension wire. Add a few extra inches for working room. Cut the wire using your wire cutters.
-
Strip the Wire: Strip approximately ½ inch of insulation from both ends of the extension wire. Be careful not to nick the copper wire itself.
-
Attach Ring Terminals: Attach the ring terminals to each end of the extension wire. If you're using a crimping tool, follow the manufacturer's instructions for proper crimping. Ensure the connection is secure and the crimp is properly formed. If soldering, use a high-quality solder and flux, ensuring a strong and clean joint.
-
Connect the Extension: Connect one end of the extension wire to the existing battery cable. Securely attach using a proper crimp or soldered joint and cover with electrical tape for added insulation.
-
Repeat the Process: Repeat steps 2-5 for the other end of the extension wire, connecting it to the appropriate terminal (starter, alternator, etc.).
-
Reconnect the Battery: Reconnect the positive (+) terminal first, then the negative (-) terminal.
-
Test the System: Start your vehicle to ensure the extended cables are working correctly. Check for any signs of overheating or unusual noises.
Troubleshooting and FAQs
What gauge wire should I use?
The appropriate gauge depends on the amperage draw of your system. Use a wire gauge equal to or larger than your original cables. A thicker gauge is always safer. Consult your vehicle's manual or a wiring diagram if you are unsure.
Can I solder instead of crimp the ring terminals?
While soldering is possible, crimping offers a more robust and reliable connection that is less susceptible to vibration and movement. Crimping is the recommended method.
My car's battery cables are very corroded. Should I still extend them?
Severely corroded cables should be replaced, not extended. Corrosion compromises the cable's conductivity and can lead to safety hazards.
What if I don't have a crimping tool?
While a crimping tool is highly recommended for a secure connection, some individuals may attempt soldering as an alternative. However, ensure you have the proper skills and tools to perform a clean and secure solder joint to maintain the reliability of the electrical connection.
By following these simple steps, you can safely and effectively extend your battery cables without needing any specialized tools. Remember to prioritize safety and always consult your vehicle's manual or seek professional help if you're unsure about any aspect of the process.

