Sanding Rims: Prep Work is Key to a Perfect Finish
Sanding rims might seem like a straightforward task, but achieving a truly professional, flawless finish requires meticulous prep work. Skipping this crucial step can lead to uneven sanding, paint imperfections, and ultimately, a subpar result. This comprehensive guide will walk you through the essential prep work needed before you even touch your sandpaper to your rims, ensuring a smooth, professional finish every time.
Why is Prep Work So Important When Sanding Rims?
Before diving into the specifics, let's understand why proper preparation is paramount. Neglecting prep work can lead to several issues:
- Uneven Sanding: Dirt, grime, and old paint can clog sandpaper, leading to inconsistent sanding and an uneven surface.
- Paint Adhesion Problems: A dirty or poorly prepared surface won't allow paint to adhere properly, resulting in peeling or chipping.
- Wasted Time and Materials: Addressing problems after the fact is far more time-consuming and costly than proper preparation upfront.
- Poor Final Finish: A rushed job will show, leading to a less-than-professional look.
What Materials Do I Need for Rim Prep?
Gathering the right tools and materials is the first step towards success. Here's a checklist:
- Safety Gear: Gloves, eye protection, and a respirator are crucial to protect yourself from dust and chemicals.
- Rim Cleaning Supplies: A pressure washer, degreaser, and various brushes (stiff and soft) are essential for thorough cleaning.
- Scrapers and Putty Knives: To remove stubborn debris, loose paint, or rust.
- Sandpaper: Various grits (e.g., 80, 120, 220, 320) are needed for progressive smoothing. Consider using wet/dry sandpaper for finer work.
- Masking Tape: To protect areas you don't want to sand.
- Primer: Essential for ensuring proper paint adhesion.
How to Prep Your Rims for Sanding: A Step-by-Step Guide
Now let's get down to the nitty-gritty. This detailed process ensures your rims are ready for a flawless sanding and paint job.
1. Thoroughly Clean the Rims
This is the most critical step. Use a pressure washer to remove loose dirt, grime, and debris. Follow up with a degreaser to eliminate any grease or oil residue. Pay close attention to hard-to-reach areas. Use various brushes to scrub thoroughly.
2. Repair Any Damage
Inspect your rims carefully for any dents, scratches, or cracks. Use a putty knife to scrape away loose paint or rust. For deeper damage, consider using automotive filler to repair dents and imperfections before sanding. Allow filler to fully cure as per manufacturer instructions.
3. Mask Off Areas You Don't Want to Sand
Use masking tape to protect any areas of the rim that you don't want to sand, such as valve stems, lug nut holes, or any chrome accents. This protects these areas from accidental damage.
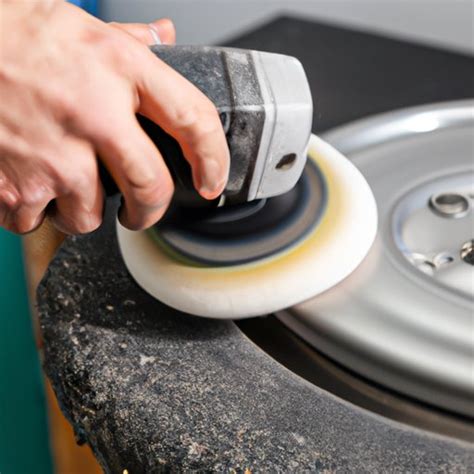
4. Start Sanding
Begin with coarser grit sandpaper (e.g., 80 grit) to remove any remaining imperfections, old paint, or rust. Gradually move to finer grits (120, 220, 320) for progressively smoother finishes. Remember to sand evenly, avoiding excessive pressure in any one area. Use wet/dry sandpaper and water for the finer grits to reduce dust and avoid clogging.
5. Clean After Sanding
Once you've achieved the desired smoothness, thoroughly clean the rims again to remove all sanding dust. This is crucial for optimal paint adhesion.
What Grit Sandpaper Should I Use?
The choice of sandpaper grit depends on the condition of your rims and the desired finish. Generally, you'll start with a coarser grit (like 80 or 100) to remove imperfections and then progress to finer grits (120, 220, 320, and even higher) for a smoother finish. Always use a finer grit after a coarser one.
How Long Does it Take to Sand Rims Properly?
The time required for sanding rims varies considerably depending on the condition of the rims and the level of detail involved. For heavily damaged rims, it could take several hours, even days, while lightly damaged rims might only take a few hours. Thorough prep work is always faster and more efficient in the long run.
Conclusion
Sanding rims is a labor of love, and the final finish is directly proportional to the effort invested in prep work. By following these steps carefully, you'll be well on your way to achieving a professional-looking finish that will last. Remember, patience and attention to detail are key to success.

