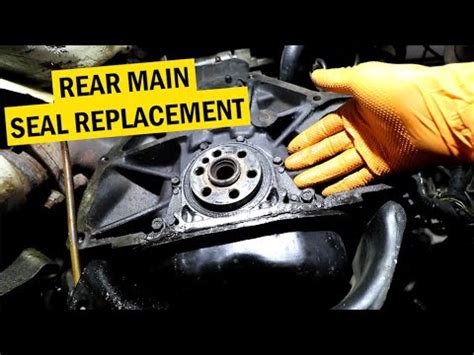
Rear Main Seal Leak: A Step-by-Step Guide to Replacement
A rear main seal leak is a frustrating, messy problem that can lead to significant oil loss and potential engine damage if left unaddressed. This comprehensive guide provides a step-by-step approach to replacing your rear main seal, empowering you to tackle this challenging repair. Disclaimer: This guide provides general information and may not be applicable to all vehicle makes and models. Consult your vehicle's repair manual for specific instructions and safety precautions. Always prioritize safety and consider professional assistance if you lack experience with automotive repair.
Understanding the Rear Main Seal
Before diving into the replacement process, let's understand what a rear main seal is and why it fails. The rear main seal is a crucial component located where the engine's crankshaft exits the engine block at the rear. Its primary function is to prevent engine oil from leaking out. Over time, the seal can deteriorate due to age, wear, and tear, resulting in oil leaks. Factors contributing to rear main seal failure include:
- Age and Degradation: Seals naturally wear out over time, becoming brittle and losing their sealing ability.
- Heat: Exposure to high engine temperatures can accelerate seal deterioration.
- Vibration: Constant engine vibrations can stress and damage the seal.
- Improper Installation: Incorrect installation during previous repairs can lead to premature seal failure.
Identifying a Rear Main Seal Leak
Accurately diagnosing a rear main seal leak is crucial before undertaking a repair. While oil leaks can originate from various sources, several telltale signs indicate a rear main seal problem:
- Oil Leak at the Rear of the Engine: A noticeable oil stain on the ground directly beneath the rear of the engine is a primary indicator.
- Oil on the Transmission or Bell Housing: Oil dripping onto the transmission or bell housing suggests a rear main seal leak.
- Low Oil Level: Consistent low oil levels despite regular oil changes point to a leak somewhere in the engine, possibly the rear main seal.
- Oil Smell: A persistent oil smell near the rear of the engine can also indicate a leak.
Tools and Materials Needed
Replacing a rear main seal requires specialized tools and materials. Be sure to gather everything before starting the repair:
- Vehicle Repair Manual: Essential for model-specific instructions and torque specifications.
- Jack and Jack Stands: To safely lift and support the vehicle.
- Engine Support Bar: To prevent engine damage during the process.
- Socket Set and Wrenches: Various sizes will be needed to remove and install components.
- Torque Wrench: Crucial for tightening bolts to the correct specifications.
- New Rear Main Seal: Ensure you purchase the correct seal for your specific vehicle.
- Oil and Filter: Replace the oil and filter after the repair.
- Cleaning Supplies: Rags, solvent, and degreaser for cleaning.
- Sealant (if required): Some seals require a specific sealant for proper installation.
Step-by-Step Rear Main Seal Replacement
This is a general overview. Consult your vehicle's repair manual for precise instructions specific to your make and model.
1. Preparation:
- Safely lift and secure the vehicle using a jack and jack stands.
- Disconnect the battery's negative terminal.
- Drain the engine oil.
2. Accessing the Rear Main Seal:
- Depending on the vehicle, this may involve removing the transmission, bell housing, or other components. Your repair manual will guide you.
3. Removing the Old Seal:
- Carefully remove the old rear main seal using appropriate tools. Avoid damaging the crankshaft during this process.
4. Cleaning:
- Thoroughly clean the crankshaft and the seal housing area to remove any debris or old sealant.
5. Installing the New Seal:
- Carefully install the new rear main seal, ensuring it's properly seated. Follow the instructions provided with the new seal.
6. Reassembly:
- Reinstall all removed components in the reverse order of removal, tightening all bolts to the manufacturer's specified torque values.
7. Refilling and Checking:
- Refill the engine with the correct amount of oil.
- Start the engine and check for leaks.
Frequently Asked Questions (FAQs)
How much does it cost to replace a rear main seal?
The cost varies significantly depending on the vehicle, labor rates, and whether you perform the repair yourself or hire a mechanic. DIY repairs are typically much cheaper, but professional assistance is recommended if you lack experience.
How long does it take to replace a rear main seal?
The time required depends on the vehicle and your experience. A simple repair might take a few hours, while complex repairs can take a whole day or more.
Can I drive with a leaking rear main seal?
Driving with a leaking rear main seal is strongly discouraged. Severe oil loss can lead to engine damage and potentially catastrophic failure. Get the repair done as soon as possible.
What are the signs of a bad rear main seal?
Signs include oil leaks at the rear of the engine, oil on the transmission or bell housing, low oil levels, and a persistent oil smell.
Is replacing a rear main seal a difficult job?
The difficulty varies depending on the vehicle and your mechanical skills. Some vehicles require significant disassembly, making it a challenging job for inexperienced individuals. Professional help may be necessary.
By carefully following these steps and consulting your vehicle's repair manual, you can successfully replace your rear main seal and prevent further engine damage. Remember safety is paramount – if you're uncomfortable performing this repair yourself, it's best to consult a qualified mechanic.

