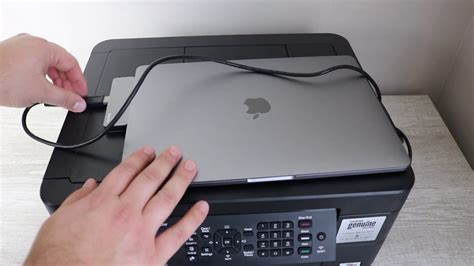
Print Without the Fuss: Your Brother Printer on Mac
Getting your Brother printer working seamlessly with your Mac should be a breeze, not a frustrating tech hurdle. This guide walks you through connecting your Brother printer to your Mac, troubleshooting common issues, and maximizing your printing experience. Whether you're using an older Brother model or the latest release, we've got you covered.
Choosing Your Connection Method: Wireless or USB?
The first step is determining how you'll connect your Brother printer to your Mac. Both wireless and USB connections offer advantages:
-
Wireless: Offers flexibility and convenience, allowing you to place your printer anywhere within your Wi-Fi network's range. Ideal for home offices or shared spaces.
-
USB: Provides a direct, stable connection, often resulting in faster print speeds. Best suited for situations requiring consistently high-speed printing, or if you lack a reliable Wi-Fi network.
How to Connect Your Brother Printer Wirelessly to Your Mac
-
Ensure your printer is powered on and connected to your Wi-Fi network. Consult your printer's manual for specific instructions on connecting to Wi-Fi. This usually involves accessing the printer's settings menu via the control panel.
-
Install the Brother printer driver. Download the correct driver from the Brother website (searching for your specific model number is crucial). The installer will guide you through the process.
-
Add the printer in macOS System Preferences. Go to System Preferences > Printers & Scanners. Your Brother printer should automatically appear in the list of available printers. Select it and click "Add."
-
Test your connection. Print a test page to verify the connection is working correctly.
How to Connect Your Brother Printer via USB to Your Mac
-
Connect your Brother printer to your Mac using a USB cable. Ensure you're using a compatible USB cable.
-
Install the Brother printer driver. As with the wireless connection, download the appropriate driver from the Brother website. The installer will guide you through the process.
-
Add the printer in macOS System Preferences. Go to System Preferences > Printers & Scanners. Your Brother printer should automatically appear. If it doesn't, click the "+" button and select your printer from the list.
-
Test your connection. Print a test page to ensure everything is working.
Troubleshooting Common Brother Printer Issues on Mac
Even with proper setup, you might encounter some issues. Here are some common problems and solutions:
H2: My Brother Printer Isn't Showing Up in System Preferences.
-
Check the cable connections: Ensure your USB cable is securely connected to both your printer and your Mac (if using a USB connection). Try a different cable if possible. For wireless connections, verify your printer is connected to your Wi-Fi network and that your Mac is also connected to the same network.
-
Restart your Mac and printer: A simple restart can often resolve temporary glitches.
-
Check the printer's network settings: Make sure the printer's IP address is correctly configured and accessible on your network.
-
Reinstall the printer driver: Sometimes, a corrupted driver can cause issues. Uninstall the current driver and download a fresh copy from the Brother website.
H2: My Brother Printer Prints Blank Pages.
-
Check the ink or toner levels: Low ink or toner is a common cause of blank pages. Replace cartridges as needed.
-
Examine the paper tray: Make sure you have paper loaded correctly in the tray and that the paper isn't jammed.
-
Check the printer settings: Verify you've selected the correct paper size and type in your print settings.
-
Restart your Mac and printer: Sometimes, a simple restart can resolve this issue.
H2: My Brother Printer Is Offline.
-
Check the network connection: Verify that your printer is connected to your Wi-Fi network and that your Mac is connected to the same network.
-
Restart your Mac and printer: This simple step often resolves connectivity problems.
-
Check the printer's status: Look for error messages on the printer's control panel.
-
Check your firewall settings: Your Mac's firewall might be blocking communication with your printer. Temporarily disable it to see if this resolves the issue. Remember to re-enable it afterward.
H2: How do I change the print settings on my Brother printer using my Mac?
Before printing a document, you'll see a "Print" dialog box. Here, you can adjust various settings:
- Paper Size & Type: Choose the correct paper size and type to ensure your document prints correctly.
- Orientation: Select portrait or landscape orientation.
- Number of Copies: Specify how many copies you need.
- Print Quality: Adjust the print quality based on your needs; higher quality uses more ink/toner but produces better results.
- Color/Black & White: Choose whether to print in color or black and white.
These options are typically found in the dialog box that appears when you select "Print" from your application.
By following these steps and troubleshooting tips, you can confidently connect and use your Brother printer with your Mac, enjoying smooth and efficient printing. Remember to always consult your printer's manual and the Brother website for the most up-to-date information and support.

