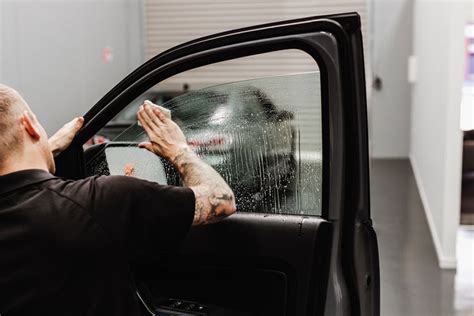
Prevent Bubbles: The Key to Proper Tint Drying
Achieving a flawless window tint installation hinges on meticulous attention to detail, and one of the most crucial aspects is preventing bubbles from forming during the drying process. Bubbles not only detract from the aesthetic appeal of your tint job but also compromise its durability and effectiveness. This comprehensive guide delves into the science behind bubble formation, offering expert techniques to ensure a smooth, bubble-free finish that lasts.
Why Do Bubbles Form in Window Tint?
Bubbles arise primarily due to trapped air or moisture between the tint film and the window glass. This can happen during several stages of the installation process. Improper squeegee technique, insufficient solution, dust particles under the film, and even variations in temperature and humidity can all contribute to bubble formation. Understanding these contributing factors is the first step to preventing them.
What is the Role of Installation Solution?
The installation solution, often a mixture of water and soap, plays a crucial role. It acts as a lubricant, allowing the tint film to be easily positioned and manipulated without sticking prematurely. Insufficient solution can lead to friction and air entrapment, resulting in bubbles. Conversely, excessive solution can cause streaks and uneven drying. Finding the right balance is key.
How to Avoid Bubbles During Window Tint Installation
Mastering the art of bubble-free tint installation involves a combination of preparation, technique, and attention to detail. Let's explore some proven methods:
1. Meticulous Preparation: The Foundation of Success
Thorough preparation is paramount. This includes:
- Cleaning the Glass: Use a high-quality glass cleaner and microfiber cloths to remove all dirt, dust, and debris from the window surface. Pay close attention to edges and corners. Consider using isopropyl alcohol for a deeper clean.
- Inspecting the Tint Film: Check the tint film for any imperfections before installation. Any creases or wrinkles should be addressed before application.
- Ambient Conditions: Ideal temperature and humidity levels are crucial. Avoid extremely hot or cold conditions, as these can affect the film's adherence.
2. Proper Squeegee Technique: The Art of Air Removal
The squeegee technique is vital for eliminating air pockets and ensuring proper adhesion. Employ the following steps:
- Start from the Center: Begin squeegeeing from the center of the film, working your way outwards. This helps to push air and solution towards the edges.
- Overlapping Strokes: Overlap each squeegee stroke to ensure complete coverage and prevent air from being missed.
- Consistent Pressure: Maintain consistent pressure while squeegeeing to prevent uneven adhesion. Too much pressure can wrinkle the film, while too little will leave air bubbles.
- Using the Right Squeegee: The squeegee blade should be clean, sharp, and the correct size for the window.
3. Managing Installation Solution: Finding the Goldilocks Amount
The correct amount of installation solution is critical. Too little, and you risk friction and bubbles. Too much, and you'll struggle with drying and potentially create streaks. Aim for a consistent, even coating that allows the film to slide easily but not be excessively wet.
4. Addressing Existing Bubbles: Repairing Imperfections
Even with meticulous technique, minor bubbles might appear. Here's how to address them:
- Small Bubbles: Small bubbles often disappear on their own as the tint dries.
- Larger Bubbles: Larger bubbles may require carefully lifting a small section of the film, releasing the trapped air, and re-squeegeeing. This requires practice and caution to avoid damaging the film.
Frequently Asked Questions (FAQs)
How long does window tint take to dry completely?
Complete drying time depends on various factors, including temperature, humidity, and the type of tint film used. Generally, it takes several hours to a day for the tint to fully dry.
What should I avoid doing while the tint is drying?
Avoid rolling down the windows, washing the car, or exposing the tinted windows to direct sunlight for at least 24 hours after installation to allow proper drying and adhesion.
Can I use a hairdryer to speed up the drying process?
Using a hairdryer is generally discouraged, as the heat can damage the tint film and cause it to shrink or warp. Allow the tint to dry naturally for best results.
My tint still has bubbles after 24 hours – What should I do?
If bubbles persist after 24 hours, it's best to contact the installer to assess the situation and determine the cause. They can determine if a re-installation is necessary.
By following these techniques and addressing the potential causes of bubble formation, you can significantly improve your chances of achieving a flawless, bubble-free window tint installation. Remember, patience and attention to detail are key ingredients in achieving professional-level results.

