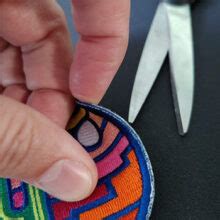
Patch Removal: How to Remove Patches Like a Pro
Removing patches, whether from clothing, gear, or other fabrics, can seem daunting. A poorly executed removal can leave behind unsightly residue, damage the underlying fabric, or even create holes. This comprehensive guide will teach you how to remove patches like a pro, ensuring a clean and professional finish every time. We'll cover various patch types and the best techniques for each, leaving your garments looking their best.
What Type of Patch Are You Removing?
Before diving into removal techniques, it's crucial to identify the type of patch you're dealing with. Different patches require different approaches. The most common types include:
- Iron-on Patches: These are the most prevalent type, attached using heat and pressure.
- Sewn-on Patches: These patches are stitched directly onto the fabric.
- Embroidered Patches: These are intricate patches with detailed stitching.
- Adhesive Patches: These use an adhesive backing for attachment.
How to Remove Iron-on Patches
Iron-on patches are arguably the most common and often the easiest to remove. However, improper removal can leave behind adhesive residue. Here's the pro approach:
Method 1: Heat and Peel
- Heat Application: Using a low-to-medium heat setting on your iron, gently apply heat to the patch for about 15-20 seconds. This softens the adhesive.
- Gentle Lifting: Once the adhesive is softened, carefully lift a corner of the patch with a flat tool like a butter knife or a spatula.
- Slow and Steady: Slowly and gently peel the patch away from the fabric, working your way across its surface. Avoid jerking or pulling too hard to prevent fabric damage.
- Residue Removal: If any adhesive residue remains, use a fabric-safe adhesive remover or rubbing alcohol on a cotton ball or clean cloth to carefully wipe it away.
Method 2: Freezing
This method is ideal for stubborn iron-on patches or delicate fabrics.
- Freezing: Place the garment in a freezer bag and freeze it for several hours, or even overnight. This will harden the adhesive.
- Careful Removal: Once frozen, carefully peel the patch away from the fabric. The cold temperature will make the adhesive brittle and easier to remove.
- Residue Removal: As with Method 1, use an appropriate adhesive remover or rubbing alcohol to remove any remaining residue.
How to Remove Sewn-on Patches
Removing sewn-on patches requires a bit more patience and precision.
- Seam Ripping: Carefully use a seam ripper to remove the stitches holding the patch in place. Work slowly and methodically to avoid damaging the surrounding fabric.
- Thread Removal: Once the stitches are removed, carefully pull out any loose threads remaining on the garment.
- Inspection: Inspect the area for any stray stitches or remaining thread fragments and remove them carefully.
How to Remove Embroidered Patches
Embroidered patches often require the same process as sewn-on patches. The intricate stitching requires even more care during the seam ripping phase. Take your time and be patient. If the patch is particularly delicate, consider seeking professional help.
How to Remove Adhesive Patches
Adhesive patches are similar to iron-on patches in their removal process. Often, heat and peeling will work. However, some might require a stronger solvent, such as Goo Gone (check for fabric compatibility). Always test in an inconspicuous area first.
Preventing Future Patch Removal Issues
- Choose the Right Patch: Consider the permanence you need. If future removal is a possibility, avoid strong adhesives or heavy stitching.
- Proper Application: Ensure patches are correctly applied to prevent future adhesion issues.
- Gentle Care: Avoid harsh scrubbing or aggressive cleaning methods that could damage the patch or its adhesive.
Frequently Asked Questions
What's the best way to remove adhesive residue from fabric after patch removal?
The best method depends on the type of adhesive. For most iron-on patch adhesives, rubbing alcohol or a fabric-safe adhesive remover works well. Always test a small, inconspicuous area first. For stubborn residue, consider using a laundry stain remover or consulting a dry cleaner.
Can I use a hairdryer to remove an iron-on patch?
While a hairdryer can provide heat to soften the adhesive, it's less controlled than an iron and can potentially damage the fabric if the heat is too high or focused in one area. An iron provides more even heat distribution and control.
How do I remove a patch from a leather jacket?
Removing patches from leather requires extra care. Gentle heat and peeling might work for some iron-on patches, but for others, it's best to consult a professional leather cleaner or repair shop. Leather is delicate and easily damaged.
What should I do if I accidentally damage the fabric while removing a patch?
If you accidentally damage the fabric, try to mend it using a needle and thread or a fabric patch. If the damage is extensive, consider taking the garment to a professional tailor or seamstress for repair.
This detailed guide should equip you with the knowledge and techniques to remove patches effectively and professionally. Remember, patience and precision are key to success. If you're ever unsure about removing a specific patch, it's always best to err on the side of caution and seek professional help to avoid damaging your valuable items.

