Master the Art of Grove Bag Curing: Time & Technique
For cannabis cultivators, the curing process is as crucial as the growing phase itself. It's the final step that transforms harvested buds from harsh, chlorophyll-laden material into the smooth, flavorful, and potent product we all appreciate. While various methods exist, grove bag curing has emerged as a popular choice for its ease of use, consistency, and ability to preserve terpene profiles. This comprehensive guide will delve into the art of grove bag curing, covering optimal timeframes and techniques to achieve perfectly cured cannabis.
What is Grove Bag Curing?
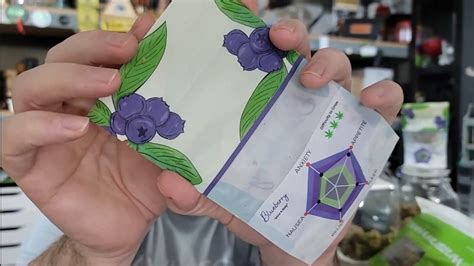
Grove bags, also known as humidity-control bags, are airtight, usually mylar bags designed specifically for cannabis curing. They're equipped with a humidity pack that maintains a consistent relative humidity (RH) level within the bag, typically around 60-65%. This controlled environment promotes gradual drying, preventing rapid moisture loss that can negatively impact flavor, aroma, and potency. The controlled environment also helps to break down chlorophyll and other undesirable compounds, further improving the final product.
How Long Does Grove Bag Curing Take?
The duration of grove bag curing isn't fixed; it depends on several factors including the initial moisture content of your buds, the desired final product characteristics, and the environmental conditions. However, a general guideline is to expect a curing period of 2-4 weeks. Some cultivators might opt for longer cures, up to 8 weeks or even longer, for a more refined and complex flavor profile.
Determining Readiness: The best way to tell if your cannabis is sufficiently cured is through careful observation. You should look for:
- Consistent color and texture: The buds should be a uniform color, and the texture should be slightly springy, not brittle or overly soft.
- Pleasant aroma: The initial harshness should subside, replaced by a sweet, complex aroma characteristic of your strain.
- Proper moisture content: Squeeze a bud gently; it should slightly compress but shouldn't release excessive moisture.
Optimizing Grove Bag Curing Techniques
To maximize the potential of grove bag curing, several key techniques should be followed:
1. Pre-Drying Your Harvest: The Foundation of Success
Before placing your buds into the grove bag, a short pre-drying period is essential. This typically lasts for 2-7 days, depending on your environment and the desired starting moisture content. The goal is to reduce the initial moisture level to prevent mold and mildew growth within the bag. Improper pre-drying is a common mistake that leads to curing problems.
2. Maintaining Optimal Humidity: The Key to Flavor
The humidity pack within your grove bag is critical. It regulates the RH, helping prevent over-drying or the development of mold. Regularly check the humidity level and replace the pack as needed, following the manufacturer's instructions. The ideal range is between 60% and 65% RH.
3. "Burping" Your Grove Bags: The Art of Air Exchange
Unlike some curing methods, grove bag curing doesn't require daily "burping" (opening the bag to release excess moisture). However, a few strategic burps during the first week can be beneficial to release some of the initial gases and prevent anaerobic conditions, which can contribute to off-flavors. Open the bag briefly (15-30 minutes) once or twice during the first week, allowing for fresh air circulation.
4. Monitoring for Mold: Vigilance is Crucial
Regularly inspect your buds for signs of mold or mildew. Look for fuzzy patches, discoloration, or unusual smells. If you detect any mold, immediately discard the affected material to prevent contamination of the entire batch.
Troubleshooting Common Grove Bag Curing Issues
H2: My buds are too dry after curing.
This usually indicates insufficient initial moisture content or inadequate humidity control during the process. Ensure proper pre-drying and monitor the humidity level within the bag regularly. If needed, add a small amount of additional humidity control (following manufacturer's guidelines) to increase the moisture content.
H2: My buds are moldy after curing.
Mold is a serious issue that points to insufficient pre-drying or poor humidity control. Poor ventilation or overly dense buds can also contribute. Ensure proper pre-drying before bagging. Monitor for signs of mold regularly and maintain optimal humidity levels.
H2: My buds have an unpleasant smell after curing.
This can be caused by improper pre-drying, inadequate ventilation (especially early on), anaerobic conditions, or contamination from mold. Ensure good airflow during pre-drying and consider adding a few burps to the first week to prevent off-flavors. Discard any moldy material immediately.
Conclusion: The Rewards of Patience
Mastering grove bag curing takes patience and attention to detail. By carefully following these guidelines, you'll reap the rewards of perfectly cured cannabis with superior flavor, aroma, and potency. Remember, the process is as much an art as a science, and experimentation will lead to refining your techniques to match your preferences and the unique characteristics of each harvest. Happy curing!

