Increase Loctite's Effectiveness: Perfect Drying Conditions for Optimal Bonding
Loctite adhesives are renowned for their strength and versatility, used across countless applications from securing screws to bonding delicate components. However, achieving the advertised strength and longevity depends heavily on proper application and, critically, ensuring the right drying conditions. This article will delve into the factors affecting Loctite's curing process and offer practical advice to maximize its effectiveness.
What Factors Affect Loctite Drying Time?
The drying time, or more accurately, the curing time, of Loctite adhesives is influenced by several key factors:
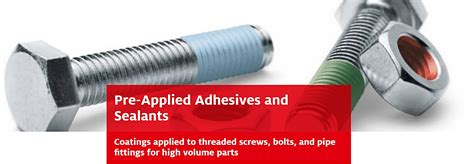
- Type of Loctite: Different Loctite products have varying cure times. Threadlockers, for instance, cure faster in tighter fits, while anaerobic adhesives require specific gap sizes for optimal performance. Always consult the manufacturer's instructions for your specific product.
- Gap Fill: Anaerobic adhesives, like many Loctite formulations, cure in the absence of air. A very tight fit accelerates the cure, while a larger gap may lead to incomplete curing or a weaker bond. The ideal gap is typically specified on the product packaging.
- Temperature: Higher temperatures generally accelerate the curing process, while lower temperatures slow it down. This is why Loctite's performance can be affected in cold environments.
- Substrate Material: The material being bonded also plays a role. Porous materials might absorb some of the adhesive, affecting the cure. Clean, dry surfaces are crucial for optimal adhesion.
- Humidity: High humidity can negatively impact the curing process of some Loctite products, potentially leading to a weaker bond or slower curing time.
How to Optimize Loctite Drying: A Step-by-Step Guide
Achieving the best results with Loctite hinges on careful application and providing ideal drying conditions. Here’s a detailed guide:
-
Surface Preparation: This is arguably the most important step. Ensure the surfaces to be bonded are clean, dry, and free from oil, grease, or any other contaminants. Use a suitable cleaning agent, such as isopropyl alcohol, to thoroughly degrease the surfaces. Allow them to dry completely before applying the Loctite.
-
Correct Application: Follow the manufacturer's instructions precisely. Apply a thin, even bead of Loctite to the intended area. Avoid excessive application, which can lead to a weaker bond or longer cure times.
-
Optimal Temperature: Ideally, cure Loctite in a temperature range recommended by the manufacturer. Generally, a room temperature environment (around 70°F or 21°C) is suitable for most Loctite products. However, higher temperatures within safe limits might speed up the process.
-
Humidity Control: If possible, control the humidity levels in the environment. Lower humidity typically provides better curing conditions for most Loctite products.
-
Proper Fixture/Clamping (If Necessary): For certain applications, proper clamping or fixing the bonded parts might be necessary to ensure consistent pressure and alignment during the curing process. Refer to the specific Loctite product instructions for guidance.
-
Cure Time: Allow the recommended cure time to elapse before applying any stress or torque to the bonded components. Premature stress can compromise the bond's strength.
Troubleshooting Common Loctite Issues
-
Loctite isn't curing: Check if the surfaces were properly cleaned, if the gap is within the recommended range, and if the temperature and humidity are appropriate. Also, ensure you're using the correct Loctite product for the application.
-
Weak bond: Inadequate surface preparation, excessive gap size, improper application, or insufficient cure time are common culprits. Review each step in the application process.
-
Loctite is too thick: Ensure the Loctite hasn't exceeded its shelf life. Store Loctite in a cool, dry place away from direct sunlight.
Frequently Asked Questions
Q: How long does Loctite take to dry? A: This varies significantly depending on the specific type of Loctite, the application, temperature, and other factors. Always refer to the manufacturer's instructions for the precise curing time.
Q: Can I speed up the Loctite drying process? A: While higher temperatures (within safe limits) can accelerate curing, excessive heat might damage the bond or the materials being joined. Follow the manufacturer's recommendations.
Q: Does Loctite work in cold weather? A: The curing process of Loctite is slower in cold temperatures. However, many Loctite products can still provide a strong bond even in colder conditions, provided sufficient cure time is allowed.
Q: What should I do if my Loctite doesn't work? A: First, review the application process carefully, making sure you've followed all instructions correctly. If the problem persists, contact Loctite's customer service or your supplier for assistance.
By following these guidelines, you can significantly improve the effectiveness of your Loctite adhesive, ensuring strong, long-lasting bonds every time. Remember to always consult the manufacturer's instructions for your specific Loctite product for the best results.

