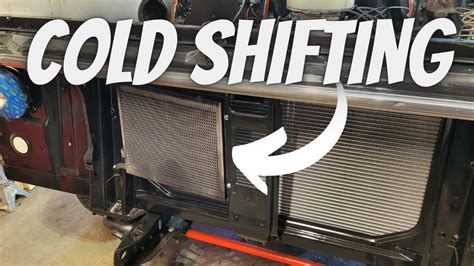
How to Install a Transmission Cooler with Ease
Overheating is a transmission's worst enemy. While modern vehicles have sophisticated transmission systems, pushing your vehicle hard—towing heavy loads, frequent stop-and-go city driving, or aggressive off-roading—can quickly lead to transmission overheating and potential catastrophic failure. A transmission cooler is your best defense against this, significantly extending the life of your automatic transmission. While it might seem daunting, installing a transmission cooler is a manageable DIY project for many car enthusiasts with basic mechanical skills. This guide walks you through the process with ease.
Why Install a Transmission Cooler?
Before diving into the installation, let's understand why a transmission cooler is a worthwhile investment. Automatic transmissions generate considerable heat during operation, especially under heavy loads. The transmission's internal fluid acts as a lubricant and coolant, but the factory-installed cooler often isn't sufficient for demanding situations. A supplemental transmission cooler provides additional cooling capacity, preventing overheating and the associated damage, including:
- Reduced Transmission Life: Excessive heat degrades the transmission fluid, leading to premature wear and tear of internal components.
- Slipping or Sluggish Shifting: Overheated fluid can cause the transmission to slip or shift sluggishly, impacting drivability and performance.
- Complete Transmission Failure: In severe cases, overheating can lead to catastrophic transmission failure, resulting in costly repairs or replacement.
What You'll Need:
Before starting, gather the necessary tools and components. This list might vary slightly depending on your vehicle and the specific cooler you've chosen:
- Transmission Cooler: Choose a cooler appropriate for your vehicle's transmission capacity and towing needs (if applicable). Consider the cooler's size and cooling capacity—larger coolers provide better cooling performance.
- Transmission Cooler Lines: These lines connect the cooler to your transmission's cooling system. You'll likely need new lines specifically designed for your cooler.
- Wrenches and Sockets: A variety of sizes to handle different bolts and fittings.
- Pliers: For clamping and securing lines.
- Transmission Fluid: You'll need fresh transmission fluid to refill your transmission after installation. Always use the correct type of fluid specified in your vehicle's owner's manual.
- Funnel: To help with refilling the transmission.
- Jack and Jack Stands: To safely lift your vehicle.
- Drain Pan: To catch old transmission fluid.
- Rags or Shop Towels: To clean up spills.
- Torque Wrench (Recommended): To ensure proper tightening of bolts and fittings.
- Optional: New Transmission Filter and Gasket: Replacing these components during the process is highly recommended.
Step-by-Step Installation Guide:
-
Safety First: Always work in a well-ventilated area. Wear safety glasses and gloves. Properly secure your vehicle using jack stands after lifting it with a jack.
-
Locate the Transmission Cooler Lines: Identify the existing transmission cooler lines that connect to your transmission.
-
Disconnect the Lines: Carefully disconnect the transmission cooler lines from the transmission. Have your drain pan ready to catch any remaining fluid.
-
Install the Transmission Cooler: Mount the new transmission cooler in a location with good airflow, usually in front of the radiator. Follow the manufacturer's instructions for mounting.
-
Connect the Cooler Lines: Connect the new transmission cooler lines to the cooler and the transmission. Use clamps to secure the lines and avoid leaks.
-
Refill the Transmission: Carefully add the correct type and amount of transmission fluid as specified in your vehicle's owner's manual.
-
Start the Engine and Check for Leaks: Run the engine for a few minutes and carefully check for leaks around all connections.
Frequently Asked Questions (FAQ)
How much does it cost to install a transmission cooler?
The cost varies depending on the type of cooler, the labor cost (if you're not doing it yourself), and any additional parts needed. You can expect to pay anywhere from $100 to $500 or more.
How long does it take to install a transmission cooler?
The installation time can vary depending on your mechanical skills and the complexity of your vehicle's system. Expect to spend at least a few hours, and potentially longer for first-timers.
Can I install a transmission cooler myself?
Yes, many people with basic mechanical skills can install a transmission cooler themselves. However, if you're not comfortable working on your vehicle, it's best to seek professional help.
What are the signs of a failing transmission cooler?
Signs include overheating, sluggish shifting, slipping gears, and transmission fluid that smells burnt.
What happens if my transmission overheats?
Overheating can lead to damaged or worn transmission components, potentially requiring extensive and costly repairs or even a complete transmission replacement.
By carefully following these steps and taking your time, you can successfully install a transmission cooler, protecting your vehicle's valuable transmission and potentially saving yourself thousands of dollars in costly repairs. Remember to always consult your vehicle's owner's manual for specific instructions and recommendations. If you’re unsure about any step, it’s always best to seek professional assistance from a qualified mechanic.

