How to Fix a Small Hole in a Rubber Boat: A Comprehensive Guide
A small puncture in your rubber boat can quickly turn a relaxing day on the water into a frustrating ordeal. Luckily, most small holes are easily repairable with the right materials and techniques. This comprehensive guide will walk you through the process, ensuring you're back on the water in no time. We'll cover everything from identifying the damage to choosing the best repair kit and mastering the patching technique.
Identifying the Hole and Assessing the Damage
Before you begin any repairs, you need to thoroughly inspect your rubber boat to locate the puncture. Inflate the boat fully to make the hole easier to spot. Look for any signs of air leakage, such as bubbles forming in the water or a noticeable hissing sound. Sometimes, the hole might be incredibly small and difficult to see. You might need to submerge the suspected area in water to identify escaping air bubbles. Once you've located the hole, assess its size. Small punctures are easily fixable, but larger tears may require more extensive repair or professional help.
What You'll Need: A Comprehensive Repair Kit
A good quality rubber boat repair kit is essential. These kits typically include:
- Repair Patches: Choose patches slightly larger than the hole to ensure complete coverage. Many kits offer various sizes to accommodate different puncture sizes. Look for patches designed specifically for rubber boats; these are usually made from durable, waterproof materials.
- Rubber Cement: This adhesive is crucial for bonding the patch securely to the boat's surface. Make sure the cement is compatible with your boat's material (usually PVC or Hypalon).
- Cleaning Agent: This is usually included in the kit and is used to clean and degrease the area around the hole. This ensures a strong bond between the patch and the boat.
- Sandpaper (Optional): While not always included, fine-grit sandpaper can help roughen the surface around the hole for improved adhesion.
- Something to inflate the patch (optional, but highly recommended): Often a small piece of plastic or wood, used to press the patch flat against the surface and avoid wrinkles.
Step-by-Step Repair Process
Now that you have your materials, let's get to the repair:
- Clean the Area: Thoroughly clean the area around the puncture with the provided cleaning agent. Remove any dirt, debris, or old adhesive. Allow the area to dry completely.
- Prepare the Patch: Cut the patch slightly larger than the hole. If your kit doesn't include sandpaper, consider using a small amount to lightly scuff the surface around the hole for better adhesion.
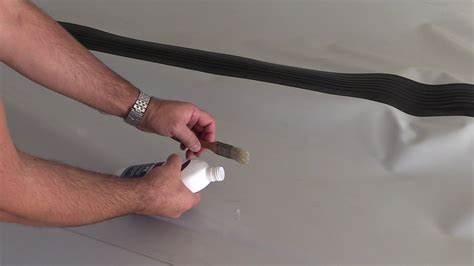
- Apply the Adhesive: Apply a thin, even layer of rubber cement to both the back of the patch and the surrounding area of the hole. Follow the manufacturer's instructions regarding drying time; this is usually crucial for a successful repair. It is preferable to do this on a dry, relatively warm day to encourage rapid and proper drying.
- Apply the Patch: Carefully position the patch over the hole, ensuring it's centered and completely covers the damage. Use your finger, or a smooth, hard object to carefully press the patch firmly to the surface to completely adhere it, ensuring no wrinkles or air bubbles are present. Using a flat object, such as a piece of plastic or wood, helps with this.
- Allow Time to Dry: Let the adhesive dry completely according to the manufacturer's instructions. This step is crucial for the success of the repair, and you will likely need to let this dry for a number of hours, or even overnight.
- Inflate and Test: Once fully dried, inflate your boat and submerge the repaired area in water to check for any remaining leaks.
How Long Does a Rubber Boat Patch Last?
The lifespan of a rubber boat patch depends on several factors, including the quality of the materials used, the size and location of the hole, and how well the repair was performed. Properly applied patches can last for several years, even with regular use. However, it's always a good idea to inspect your boat regularly for any signs of wear or damage.
How to Prevent Punctures in Your Rubber Boat
Prevention is always better than cure! Here are some tips to help prevent punctures:
- Careful Handling: Avoid dragging your boat over sharp rocks or debris.
- Storage: Store your boat in a clean, dry place away from sharp objects.
- Proper Inflation: Overinflation can weaken the material, making it more susceptible to punctures.
What if the Hole is Too Large to Patch?
For larger tears or significant damage, a simple patch may not suffice. In these cases, you may need to consider a more extensive repair, or seek the assistance of a professional repair shop specializing in inflatable boats. They have the tools and expertise to handle complex repairs effectively.
Can I use a different adhesive?
While the rubber cement included in most repair kits is specifically formulated for rubber boats, using a different adhesive is not recommended. Other adhesives may not provide the necessary strength and waterproofing, and could potentially damage the rubber material of the boat.
This guide should provide you with the confidence to tackle minor repairs on your inflatable boat. Remember, patience and attention to detail are key to a successful repair. By following these steps, you can ensure your rubber boat remains seaworthy and ready for many more adventures on the water!

