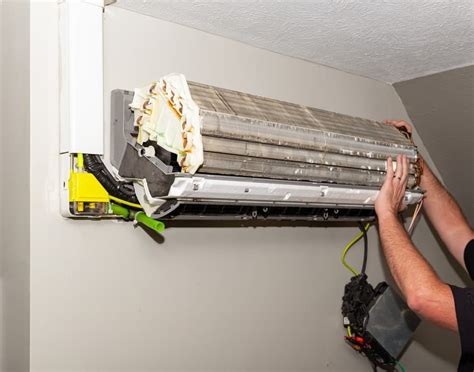
How to Diagnose and Fix a Frozen Mini Split
Mini split systems are popular for their energy efficiency and individual room climate control. However, a common problem is freezing up, which can significantly impact performance and potentially damage the unit. This comprehensive guide will walk you through diagnosing and fixing a frozen mini split, helping you restore comfort to your home. This article is for informational purposes only and should not replace professional HVAC advice. If you are uncomfortable working with electrical components or refrigerants, contact a qualified technician.
Why is My Mini Split Frozen?
Several factors can cause a mini split to freeze. Understanding the root cause is crucial for effective troubleshooting. The most common culprits include:
-
Restricted Airflow: This is the most frequent cause. Dust, debris, or obstructions blocking the indoor unit's air intake or output restrict airflow, causing coils to freeze. Dirty air filters are a primary culprit.
-
Insufficient Refrigerant: Low refrigerant levels reduce the system's cooling capacity, leading to prolonged operation and ice formation. This requires professional attention.
-
Faulty Drain Line: The condensate drain line removes moisture from the air. If clogged or improperly sloped, water accumulates, leading to freezing.
-
Incorrect Thermostat Settings: Setting the temperature too low can overload the system, leading to freezing.
-
Air Leaks: Significant air leaks in the ductwork or around the unit can cause the system to work harder and freeze up.
-
Defective Components: Rarely, a malfunctioning fan motor, compressor, or other internal component can cause freezing.
How to Diagnose a Frozen Mini Split
Before attempting any repairs, turn off the mini split system at the breaker box for safety. Then, systematically investigate potential problems:
1. Check the Air Filter
This is the easiest and most frequently overlooked step. A dirty filter severely restricts airflow. Remove the filter, clean it thoroughly (or replace it if necessary), and re-install it. Run the unit for a few hours to see if the problem resolves.
2. Inspect for Obstructions
Carefully examine the indoor unit's air intake and output vents. Ensure nothing is blocking them, such as curtains, furniture, or dust buildup. Use a vacuum cleaner with a brush attachment to clean any obstructions.
3. Examine the Drain Line
Locate the condensate drain line (usually a small pipe exiting the indoor unit). Check for clogs or kinks. Gently flush the line with a drain cleaner solution designed for HVAC systems (avoid harsh chemicals). Ensure the line is properly sloped to allow for proper drainage.
4. Verify Refrigerant Levels (Professional Help Required)
Low refrigerant levels require professional attention. Refrigerant handling necessitates specialized tools and knowledge. Attempting to recharge refrigerant yourself is dangerous and can void warranties.
5. Check Thermostat Settings
Ensure the thermostat settings are reasonable and appropriate for the room's size and insulation. Avoid setting the temperature excessively low.
6. Inspect for Air Leaks (Professional Help Recommended)
Detecting air leaks may require professional assistance. A qualified technician can identify and seal leaks effectively, improving system efficiency.
How to Fix a Frozen Mini Split
Once you've identified the cause, you can address the problem. Remember, always prioritize safety and turn off the unit at the breaker box before any work.
1. Cleaning the Air Filter and Removing Obstructions
Regularly cleaning the air filter (every 1-3 months depending on usage) is crucial for preventing future freezing. Remove obstructions from the air intake and output vents.
2. Clearing the Drain Line
Use a drain cleaner solution, but ensure it’s compatible with your system. If the clog persists, you may need to call a technician.
3. Refrigerant Recharge (Professional Service Only)
This is a job for a professional HVAC technician. Low refrigerant requires proper handling and specialized equipment.
4. Addressing Air Leaks (Professional Service Recommended)
Properly sealing air leaks improves the efficiency of your mini split system. It may involve professional help for proper detection and repair.
5. Replacing Faulty Components (Professional Service Only)
If a faulty component is suspected (like a fan motor or compressor), contact a qualified technician for diagnosis and replacement.
Preventing Future Freezing
-
Regular Maintenance: Schedule regular maintenance checks, including filter cleaning, drain line inspections, and airflow assessments.
-
Proper Installation: Ensure your mini split system is installed correctly by a qualified professional.
-
Optimal Thermostat Settings: Use a programmable thermostat to optimize temperature settings based on your schedule.
-
Regular Cleaning: Keep the area around your indoor unit free of dust and debris.
By carefully following these steps and understanding the common causes of mini split freezing, you can diagnose and address the issue effectively. Remember that for certain repairs, especially those involving refrigerant or complex components, professional help is crucial. Prioritizing safety and obtaining expert advice will ensure the longevity and efficiency of your mini split system.

