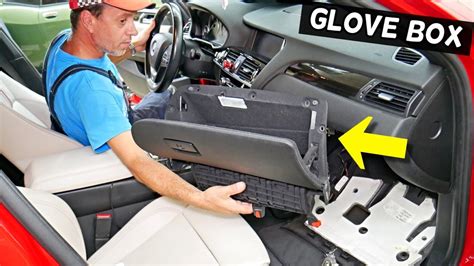
Glove Box Removal: Problems and Solutions
Removing a glove box might seem like a simple task, but it can quickly become frustrating if you encounter unexpected problems. This comprehensive guide will walk you through the common challenges associated with glove box removal, providing practical solutions to get the job done efficiently and safely. Whether you're performing routine maintenance, upgrading your car's interior, or tackling a more complex repair, understanding these potential hurdles will save you time and aggravation.
Why Remove a Glove Box?
Before diving into the problems, let's quickly address why someone would want to remove their glove box. Common reasons include:
- Repairing or Replacing the Glove Box: Damage to the glove box itself, such as cracks or broken hinges, necessitates removal for repair or replacement.
- Accessing Components Behind the Glove Box: Many car systems, including HVAC components, wiring harnesses, and even the cabin air filter, are located behind the glove box, requiring removal for access.
- Installing Aftermarket Accessories: Some car modifications, such as upgraded speakers or additional lighting, might necessitate glove box removal for proper installation.
- Cleaning the Area: A thorough cleaning behind the glove box can be significantly easier with the glove box removed.
Common Problems Encountered During Glove Box Removal
Several issues can arise when attempting to remove a glove box, depending on the make, model, and year of your vehicle.
1. Hidden Fasteners and Clips:
This is arguably the most common problem. Glove boxes aren't typically secured with readily visible screws. Instead, they often rely on a series of hidden clips, plastic rivets, or even screws concealed behind trim pieces. Locating these fasteners can be challenging and often requires careful inspection and gentle probing.
Solution: Consult your vehicle's repair manual. This is your best resource for understanding the exact location and type of fasteners used to secure your glove box. If you don't have a manual, online forums dedicated to your car model can be invaluable sources of information, often including pictures and step-by-step guides. Use a plastic pry tool or trim removal tool to carefully release the clips without damaging the plastic.
2. Broken or Stuck Clips:
Even with careful removal, aged or brittle plastic clips can break, making it difficult to release the glove box. This is particularly common in older vehicles.
Solution: Patience is key. If a clip breaks, try to salvage the remaining pieces to assess how the glove box is secured. You may need to replace the broken clip. These are often available at auto parts stores or online retailers, but be sure to specify your vehicle's make, model, and year. In some cases, you can use a small zip tie or other suitable fastener as a temporary replacement.
3. Difficult-to-Reach Fasteners:
Some glove boxes are secured with fasteners located in awkward or hard-to-reach positions, making access difficult.
Solution: Use a flexible extension or magnetic pick-up tool to reach and remove stubborn fasteners. A flashlight or small work light can greatly improve visibility in tight spaces. Take your time and be patient; rushing can lead to damage.
4. Incorrect Removal Procedure:
Attempting to remove the glove box without understanding the proper procedure can lead to damage or breakage. Pulling too hard or using excessive force can easily break delicate clips or damage the glove box itself.
Solution: Always consult your vehicle's repair manual or search for reliable online tutorials specific to your car model. Understanding the step-by-step process will minimize the risk of damage.
5. Wiring and Connections:
Some glove boxes have internal lights or other electrical components, requiring the disconnection of wires before removal. Failing to disconnect these properly can cause damage to the wiring or even the vehicle's electrical system.
Solution: Before attempting removal, carefully inspect the glove box for any visible wiring or connectors. Disconnect these carefully and label the wires to prevent confusion during reassembly. Take pictures for reference.
Preventing Problems During Glove Box Removal
- Consult the Repair Manual: Always refer to your vehicle's repair manual before beginning any work. This will provide detailed instructions and diagrams.
- Use the Right Tools: Use plastic pry tools or trim removal tools to avoid scratching or damaging the glove box or surrounding trim.
- Work Slowly and Carefully: Rushing can lead to mistakes and damage. Take your time and proceed methodically.
- Take Pictures: Before beginning disassembly, take pictures of the glove box and its mounting points to assist with reassembly.
By understanding the common problems and following the solutions outlined above, you can successfully remove your glove box and complete your project with confidence. Remember, patience and careful attention to detail are crucial for avoiding complications and ensuring a smooth process.

