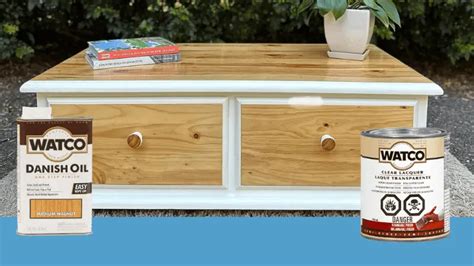
Danish Oil Drying Time: A Simple Guide for Beginners and Experts
Danish oil is a popular choice for wood finishing, prized for its ability to penetrate deep into the wood grain, enhancing its natural beauty and providing protection. However, understanding Danish oil drying time is crucial for achieving a successful finish. This comprehensive guide will explore the drying process, influencing factors, and best practices for both beginners and experienced woodworkers.
What is Danish Oil?
Before diving into drying times, let's clarify what Danish oil actually is. It's not a true oil in the sense of linseed oil or tung oil. Instead, it's typically a blend of drying oils (like linseed or tung oil), solvents (like mineral spirits or citrus solvents), and sometimes added resins or varnishes for increased durability and water resistance. This blend determines the final drying time and the overall properties of the finished product.
How Long Does Danish Oil Take to Dry?
This is the million-dollar question, and unfortunately, there's no single definitive answer. The drying time of Danish oil is highly variable and depends on several factors. A general guideline is that it takes 24-48 hours for the initial surface to dry to the touch, but this doesn't mean the oil is fully cured. Full cure can take anywhere from several days to several weeks, sometimes even longer depending on the conditions.
Factors Affecting Danish Oil Drying Time:
- Temperature: Warmer temperatures accelerate drying. High humidity, conversely, slows it down.
- Humidity: High humidity significantly slows the drying process, as moisture competes with the oil for space in the wood.
- Wood Type: Dense hardwoods may take longer to absorb and dry the oil compared to softer woods. The porosity of the wood plays a significant role.
- Oil Type/Formulation: Different brands and formulations of Danish oil will have different drying times, so always check the manufacturer's instructions.
- Application Method: Thick applications will take much longer to dry than thin, even coats.
- Ventilation: Good ventilation aids in the evaporation of solvents, speeding up the drying process.
H2: How to Speed Up Danish Oil Drying Time
While you can't magically speed up the curing process, you can optimize conditions to accelerate the initial drying:
- Ensure Proper Ventilation: Open windows and use fans to increase air circulation.
- Maintain a Consistent Temperature: A warm, dry environment is ideal. Avoid extreme temperatures.
- Apply Thin Coats: Multiple thin coats are always better than one thick coat. This allows each layer to properly absorb and dry before applying the next.
- Use a Heat Lamp (with Caution): A low-heat lamp can gently accelerate drying, but use caution to avoid scorching the wood. Keep the lamp at a safe distance and monitor the wood's temperature regularly.
H2: What Happens If Danish Oil Doesn't Dry Properly?
If Danish oil doesn't dry properly, it can lead to several issues:
- Tackiness: The surface remains sticky or gummy to the touch.
- Dust Accumulation: The uncured oil attracts and traps dust particles.
- Poor Durability: The finish won't be as durable and resistant to water or scratches.
H2: How Can I Tell if My Danish Oil is Fully Cured?
Full cure is not simply about the surface being dry to the touch. A fully cured Danish oil finish will be hard, smooth, and resistant to water. You can test this by applying a water droplet to the surface. If the water beads up and doesn't penetrate, the oil is likely fully cured. However, the best way to ensure proper curing is to follow the manufacturer's recommendations for drying times.
H2: Can I Use Danish Oil on Furniture?
Yes, Danish oil is suitable for many types of furniture, especially those made from wood. However, remember that Danish oil provides a protective finish but is not as durable as polyurethane or other hard finishes. It's best suited for furniture that won't experience excessive wear and tear.
H2: Is Danish Oil Food Safe?
Many brands of Danish oil are not food-safe, especially those containing solvents or resins. Always check the manufacturer’s specifications and recommendations before using Danish oil on items that may come into contact with food.
Conclusion
Understanding Danish oil drying time is essential for a successful wood finishing project. By understanding the factors that influence drying and following best practices, you can achieve a beautiful and durable finish that enhances the beauty of your wood projects, whether you're a beginner or a seasoned professional. Remember to always consult the manufacturer's instructions for specific drying recommendations for their product.

