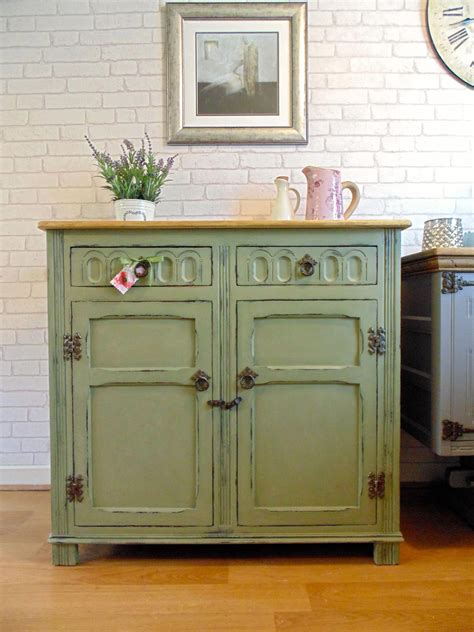
Chalk Paint Distressing: From Shabby to Chic
Chalk paint's popularity stems from its versatility and ease of use, but its true magic lies in the ability to create stunning distressed finishes. This technique transforms ordinary furniture into unique, character-filled pieces, effortlessly blending shabby chic with modern elegance. This guide will walk you through the process of chalk paint distressing, from choosing the right tools to achieving the perfect level of wear.
What is Chalk Paint Distressing?
Chalk paint distressing is the art of creating a worn, aged look on furniture painted with chalk paint. It involves strategically removing paint in certain areas to reveal underlying layers or wood grain, giving the piece a lived-in, antique feel. The level of distressing can vary widely, from subtle hints of wear to a heavily antiqued appearance. The beauty of this technique lies in its adaptability; you can tailor the distress level to perfectly match your desired aesthetic.
Tools of the Trade: Gathering Your Supplies
Before you embark on your distressing journey, ensure you have the right tools. This will make the process smoother and yield better results. You'll need:
- Chalk paint: Choose your desired color(s). Multiple colors can be layered for added depth and dimension.
- Primer (optional): Priming is beneficial for porous surfaces like wood, ensuring even paint coverage and preventing bleed-through.
- Paintbrushes: A variety of brushes—from smaller detail brushes to larger ones for base coats—will be helpful.
- Sandpaper: Various grits are recommended. Fine-grit sandpaper (220-grit) is ideal for subtle distressing, while coarser grits (80-120 grit) create more dramatic wear.
- Wax (optional): Wax adds protection and enhances the aged look. Clear wax is a popular choice.
- Soft cloths: Use these for applying wax and wiping away excess paint.
- Steel wool (optional): Offers a different texture and distressing effect compared to sandpaper.
- Dry brush: A dry brush technique can be used for a softer, more subtle distressing effect.
How to Distress Chalk Paint: A Step-by-Step Guide
1. Preparation is Key: Clean and prepare your furniture piece. Remove any existing hardware and lightly sand the surface to ensure good adhesion. If necessary, apply a primer.
2. Applying the Base Coat: Apply your chosen chalk paint color(s) using even strokes. Allow each coat to dry completely before applying the next. The number of coats will depend on the desired opacity and color depth.
3. The Distressing Process: This is where the fun begins! Using your sandpaper (or steel wool), gently rub away the paint in areas that would naturally wear over time—edges, corners, raised details, and areas prone to frequent use. Remember to vary your pressure to achieve a realistic look; some areas should show more wear than others.
4. Refining the Distressed Look: Once you've achieved the desired level of distressing, you can use a finer grit sandpaper to soften any harsh lines or edges.
5. Sealing and Protecting: Apply a coat of wax to seal the paint and protect your finished piece. Buff the wax thoroughly with a soft cloth for a smooth, polished finish.
What are the Different Types of Distressing Techniques?
There are several ways to distress chalk paint, each yielding a unique finish:
- Dry brushing: This involves using a dry brush with little paint to create a subtle, weathered look. Ideal for a more delicate, less dramatic effect.
- Sandpaper distressing: This is the most common method, using sandpaper of varying grits to remove paint in controlled areas.
- Steel wool distressing: This technique creates a slightly different texture than sandpaper, providing a more random and slightly coarser appearance.
- Layering and distressing: This method involves applying multiple colors and then distressing to reveal the underlying layers, adding depth and complexity to the finish.
How Do I Achieve a Specific Level of Distressing?
The level of distressing depends on your personal preference and the desired aesthetic. For subtle distressing, use fine-grit sandpaper and apply light pressure. For a more heavily distressed look, use coarser sandpaper and apply more pressure, focusing on areas that would show the most wear. Experiment on a scrap piece of wood before tackling your furniture to get a feel for the techniques and desired outcome.
What is the Best Type of Sandpaper to Use for Chalk Paint Distressing?
The best sandpaper grit depends on the level of distressing you want to achieve. For a light distress, use 220-grit sandpaper. For a more dramatic effect, use 120-grit or even coarser sandpaper. Always test on a hidden area first.
How Do I Protect My Distressed Chalk Paint Furniture?
After distressing and painting, sealing the piece is crucial. A coat of wax is excellent for protection and adds to the antique feel. Alternatively, you can use a clear sealant designed for chalk paint. This will prevent chipping and protect the finish from moisture and scratches.
By following these steps and experimenting with different techniques, you can transform your furniture from ordinary to extraordinary, showcasing your unique style with the charm of beautifully distressed chalk paint. Remember that practice makes perfect; don't be afraid to experiment and have fun with the process!

