Box Grader Best Practices for Every Project
Achieving a perfectly level and smooth surface is crucial for various agricultural and landscaping projects. A box grader is the ideal tool for this task, capable of efficiently leveling soil, gravel, or asphalt. However, maximizing its effectiveness requires understanding and implementing best practices. This comprehensive guide outlines essential techniques to ensure every project yields optimal results, from initial preparation to final finishing.
What is a Box Grader and Why Use One?
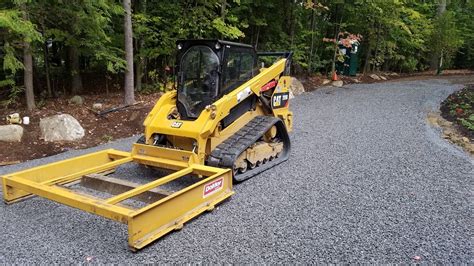
A box grader, also known as a land plane or grader box, is a piece of agricultural equipment used to smooth and level surfaces. It typically consists of a rigid frame with adjustable blades or scarifiers that scrape and move material, creating a uniform grade. Box graders are versatile and used in diverse applications including:
- Agricultural land preparation: Leveling fields for planting, improving drainage, and creating even seedbeds.
- Road construction and maintenance: Smoothing gravel roads, preparing bases for asphalt, and maintaining road surfaces.
- Landscaping: Leveling land for patios, driveways, and other landscaping projects.
- Sports fields: Creating perfectly level playing surfaces for various sports.
The benefits of using a box grader include increased efficiency, improved accuracy, and a superior finished product compared to manual leveling methods.
Pre-Project Planning: Essential Steps for Success
Before you even start the engine, meticulous planning is key to a successful box grading project.
1. Site Assessment and Preparation:
Thoroughly assess the area to be graded. Identify existing obstacles like rocks, debris, or large variations in elevation. Remove any significant obstructions to prevent damage to the grader or inconsistent grading. Consider the soil type; different soils require different grading techniques and blade adjustments.
2. Defining the Desired Grade:
Establish a clear target grade. Use surveying equipment or established benchmarks to determine the desired elevation. This ensures a consistent and accurate final result. Accurate grading avoids water pooling and promotes even drainage.
3. Choosing the Right Box Grader:
Select a box grader appropriate for the size and complexity of the project. Consider factors such as the width of the grader, its capacity, and the type of blades or scarifiers.
Box Grader Operation: Mastering the Technique
Operating a box grader effectively requires skill and attention to detail.
1. Proper Setup and Blade Adjustment:
Adjust the blades to the desired depth and angle. Start with shallower passes and gradually increase depth as needed. Incorrect blade settings can lead to uneven grading or damage to the equipment.
2. Overlapping Passes:
Overlapping passes are crucial to ensure complete coverage and prevent streaking. Maintain consistent speed and overlap each pass by approximately one-third to one-half of the grader's width.
3. Maintaining Consistent Speed:
A consistent speed is essential for achieving a uniform grade. Avoid abrupt changes in speed, which can lead to uneven results. The optimal speed will depend on the soil conditions and the desired level of finish.
4. Monitoring and Adjustments:
Continuously monitor the grading process and make necessary adjustments to blade depth and angle as needed. Regularly check for any irregularities in the surface and correct them promptly.
Post-Grading Procedures: Ensuring a Flawless Finish
Once the initial grading is complete, further refinement may be necessary.
1. Final Grading and Refinement:
After the initial passes, conduct a final grading pass to smooth out any remaining imperfections. Use a lighter touch to avoid over-grading.
2. Compaction:
Depending on the project's requirements, compact the graded material to ensure stability and prevent settling. This is particularly important for driveways, roads, and other areas subjected to heavy traffic.
3. Clean-Up and Maintenance:
After completion, clean the box grader thoroughly to remove any debris or accumulated soil. Regular maintenance is essential to prolong the life of the equipment and ensure its continued effectiveness.
Frequently Asked Questions (FAQs)
What type of soil is best suited for box grading?
Box graders can work effectively on a variety of soils, but they work best on soils that are relatively dry and loose. Clay soils can be challenging due to their stickiness, while extremely rocky soils may require additional pre-preparation to avoid damage.
How do I choose the right size box grader for my project?
The size of the box grader should be chosen based on the size of the area to be graded. A larger box grader is more efficient for large projects, but may be less maneuverable in tight spaces. Consider the width of the area to ensure proper coverage in each pass.
What are some common mistakes to avoid when using a box grader?
Common mistakes include incorrect blade adjustments, inconsistent speed, insufficient overlapping passes, and neglecting to check for irregularities during the grading process. Always start with shallower passes and gradually increase depth. Thorough planning and careful execution are essential.
Can a box grader be used on asphalt?
Yes, box graders can be used on asphalt, but they typically require specialized blades and careful operation to avoid damaging the surface. It’s often best to use a box grader for preparing the base layer before applying asphalt.
By following these best practices, you can significantly improve the efficiency and effectiveness of your box grading projects, resulting in a superior finished product that meets the highest standards. Remember that safety should always be your top priority. Always follow the manufacturer's instructions and take appropriate safety precautions when operating heavy equipment.

