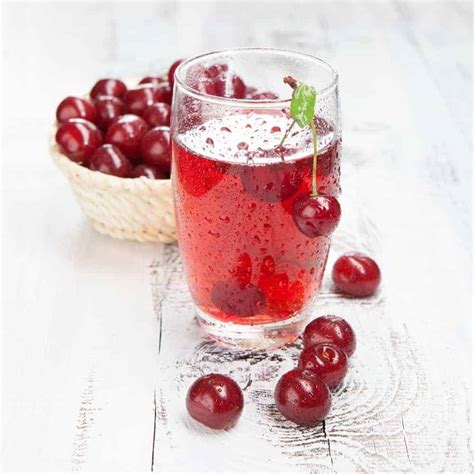
A Beginner's Guide to Delicious Cherry Wine
Making your own cherry wine is a rewarding experience, transforming the vibrant sweetness of cherries into a delightful, homemade beverage. This beginner's guide will walk you through the process, offering tips and tricks to ensure a successful and delicious outcome. Whether you're using fresh, frozen, or even commercially available cherry juice, you can craft a unique wine reflecting your personal touch.
What Kind of Cherries Should I Use?
The type of cherry significantly impacts the final flavor profile of your wine. Sweet cherries, like Bing or Rainier, will yield a sweeter wine, while tart cherries, like Montmorency or Balaton, contribute a more acidic and complex taste. You can even blend different varieties to achieve a balanced sweetness and tartness. Using a mix of both sweet and tart cherries is a popular method for beginners. Remember that slightly underripe cherries often work best for winemaking due to their higher acidity.
How Much Fruit Do I Need?
This depends on your desired batch size. A typical recipe might call for 5-10 pounds of cherries for a 1-gallon batch. It's important to remember that cherries contain a significant amount of water, so don't be afraid to adjust the amounts based on your specific recipe. Using a larger quantity of cherries may require an adjustment in the yeast nutrient and sugar additions.
What Equipment Do I Need?
Making cherry wine requires some basic equipment, much of which you may already have in your kitchen:
- Food-grade bucket: For fermentation. A 6-gallon bucket is a good starting point.
- Airlock: To allow CO2 to escape while preventing oxygen from entering. This is crucial for preventing spoilage.
- Siphon tubing: To transfer wine between containers without disturbing sediment.
- Bottles: For storing the finished wine.
- Bottling bucket: For easy transfer into bottles.
- Hydrometer: (Optional but recommended) Measures the sugar content and alcohol levels during fermentation.
- Sanitizer: Star San or another no-rinse sanitizer is essential for sterilizing equipment and preventing unwanted bacteria or wild yeasts.
What Ingredients Will I Need?
Beyond the cherries themselves, you'll need these essential ingredients:
- Sugar: Provides the yeast with food for fermentation. The amount will depend on the sweetness of your cherries and your desired level of sweetness in the final wine.
- Yeast: Wine yeast is specifically designed for wine fermentation. Choose a yeast strain suited for fruit wines.
- Yeast nutrient: Helps the yeast thrive during fermentation.
- Campden tablets (potassium metabisulfite): Helps sanitize the juice and prevent unwanted bacteria.
- Pectic enzyme (optional): Helps clarify the juice by breaking down pectin, resulting in a clearer wine.
How Long Does It Take to Make Cherry Wine?
The entire process, from fruit preparation to bottling, can take several months. This includes fermentation, which typically lasts several weeks, followed by aging, which can last anywhere from a few months to a year or more, depending on the desired flavor profile. Patience is key to a truly delicious cherry wine.
How Do I Make Cherry Wine? A Step-by-Step Guide
A detailed step-by-step recipe would be too extensive for this article, but the general process involves:
- Sanitize equipment: Thoroughly sanitize all equipment that will come into contact with the wine.
- Prepare the cherries: Wash, pit, and crush the cherries. You can use a food processor or a potato masher.
- Add Campden tablets: Dissolve the Campden tablets in a small amount of water and add them to the crushed cherries. This will kill off wild yeasts and bacteria.
- Add pectin enzyme (optional): Add pectin enzyme as per the package instructions.
- Add sugar and water: Add the calculated amount of sugar dissolved in water.
- Add yeast nutrient: This helps the yeast thrive during fermentation.
- Add yeast: Once the temperature is optimal (generally around 68-72°F), add the wine yeast.
- Fermentation: Allow the mixture to ferment for several weeks in a primary fermenter with an airlock.
- Racking: After fermentation, carefully transfer the wine to a secondary fermenter to allow it to clear.
- Aging: Allow the wine to age for several months or even a year to develop its flavor.
- Bottling: Once the wine is clear and the desired flavor is achieved, bottle and seal it.
What are the common mistakes beginners make when making cherry wine?
Many beginners make common mistakes. These include improper sanitation leading to spoilage, using incorrect amounts of sugar leading to unbalanced flavors, failing to follow yeast instructions, and being impatient with the aging process. It is important to consult reputable recipes and follow instructions diligently. Careful record-keeping of each step is also invaluable.
Can I Use Frozen Cherries to Make Wine?
Yes, you can absolutely use frozen cherries to make wine! Make sure to thaw them completely before using, and be aware that they might have lost some of their flavor and aroma compared to fresh cherries. You might need to adjust sugar levels depending on the sweetness of your frozen cherries.
How Do I Know When My Cherry Wine Is Ready to Drink?
Your cherry wine is ready to drink when the fermentation is complete, the wine is clear, and it has reached a desirable flavor profile. This can take anywhere from a few months to over a year, depending on the recipe and your personal preference. Taste-testing throughout the aging process helps you determine when it’s at its peak.
Making cherry wine is a fun and rewarding project that allows you to experiment with different flavors and techniques. With a little patience and attention to detail, you can create a delicious homemade wine that you'll be proud to share with friends and family. Remember, don't be afraid to experiment and find your own unique style!

